
How to Create the Ideal Ergonomic Desk Setup – A Step-by-Step Guide for Pain-Free Workdays

Your ideal ergonomic desk setup could be the difference between thriving at work and counting down the hours until you can finally stretch your aching shoulders. If you spend 6+ hours daily at a computer, you've probably felt it: that creeping tension in your neck, the dull throb in your wrists, the low back stiffness that follows you home.
Here's the good news. Most of that discomfort isn't inevitable. It's fixable. With the right adjustments to your chair, monitor, keyboard, and mouse, you can create a workspace that supports your body instead of working against it.
This guide walks you through seven concrete steps to build an ergonomic setup that reduces strain, prevents repetitive stress injuries, and helps you work comfortably for years to come. No vague advice here. You'll get specific measurements, angles, and actionable changes you can make today.
Key Takeaways
- An ideal ergonomic desk setup prevents musculoskeletal disorders that cause workers to lose an average of 23 productive days per year.
- Position your monitor at arm's length with the top of the screen at or slightly below eye level to maintain a neutral neck position.
- Adjust your chair for 90-90-90 alignment—hips, knees, and elbows should all form roughly 90-degree angles while working.
- Keep your keyboard and mouse within 8–12 inches of your resting hand position to reduce shoulder strain from constant reaching.
- Upgrade to an ergonomic mouse or split keyboard to promote neutral wrist positioning and prevent repetitive stress injuries.
- Take micro-breaks every 20–30 minutes and alternate between sitting and standing to combat the strain of static posture.
Why Your Desk Setup Matters More Than You Think

You might assume that a little wrist discomfort or neck stiffness is just part of desk work. It's not. These small signals often escalate into chronic conditions that can sideline your career.
A poorly arranged workspace forces your body into compensatory postures. You slouch forward to see your monitor. You reach too far for your mouse. Your shoulders creep toward your ears. Over weeks and months, these micro-stresses compound.
The Real Cost of a Non-Ergonomic Workspace
The Bureau of Labor Statistics reports that musculoskeletal disorders account for nearly 30% of all worker injury and illness cases requiring days away from work. For knowledge workers, the most common culprits are:
- Carpal tunnel syndrome from sustained wrist extension
- Tennis elbow (lateral epicondylitis) from repetitive mouse use
- Cervical strain from forward head posture
- Lower back pain from unsupported sitting
These aren't minor inconveniences. A 2023 study found that workers with untreated RSI lose an average of 23 productive workdays per year. That's nearly a full month of compromised performance.
Beyond productivity, there's the financial hit. Physical therapy sessions, ergonomic consultations, and medical visits add up. Many professionals spend $1,500–$3,000 treating conditions that proper setup could have prevented.
Understanding workplace ergonomics isn't optional if you rely on a computer for your livelihood. It's essential protection for your most valuable professional asset: your body.
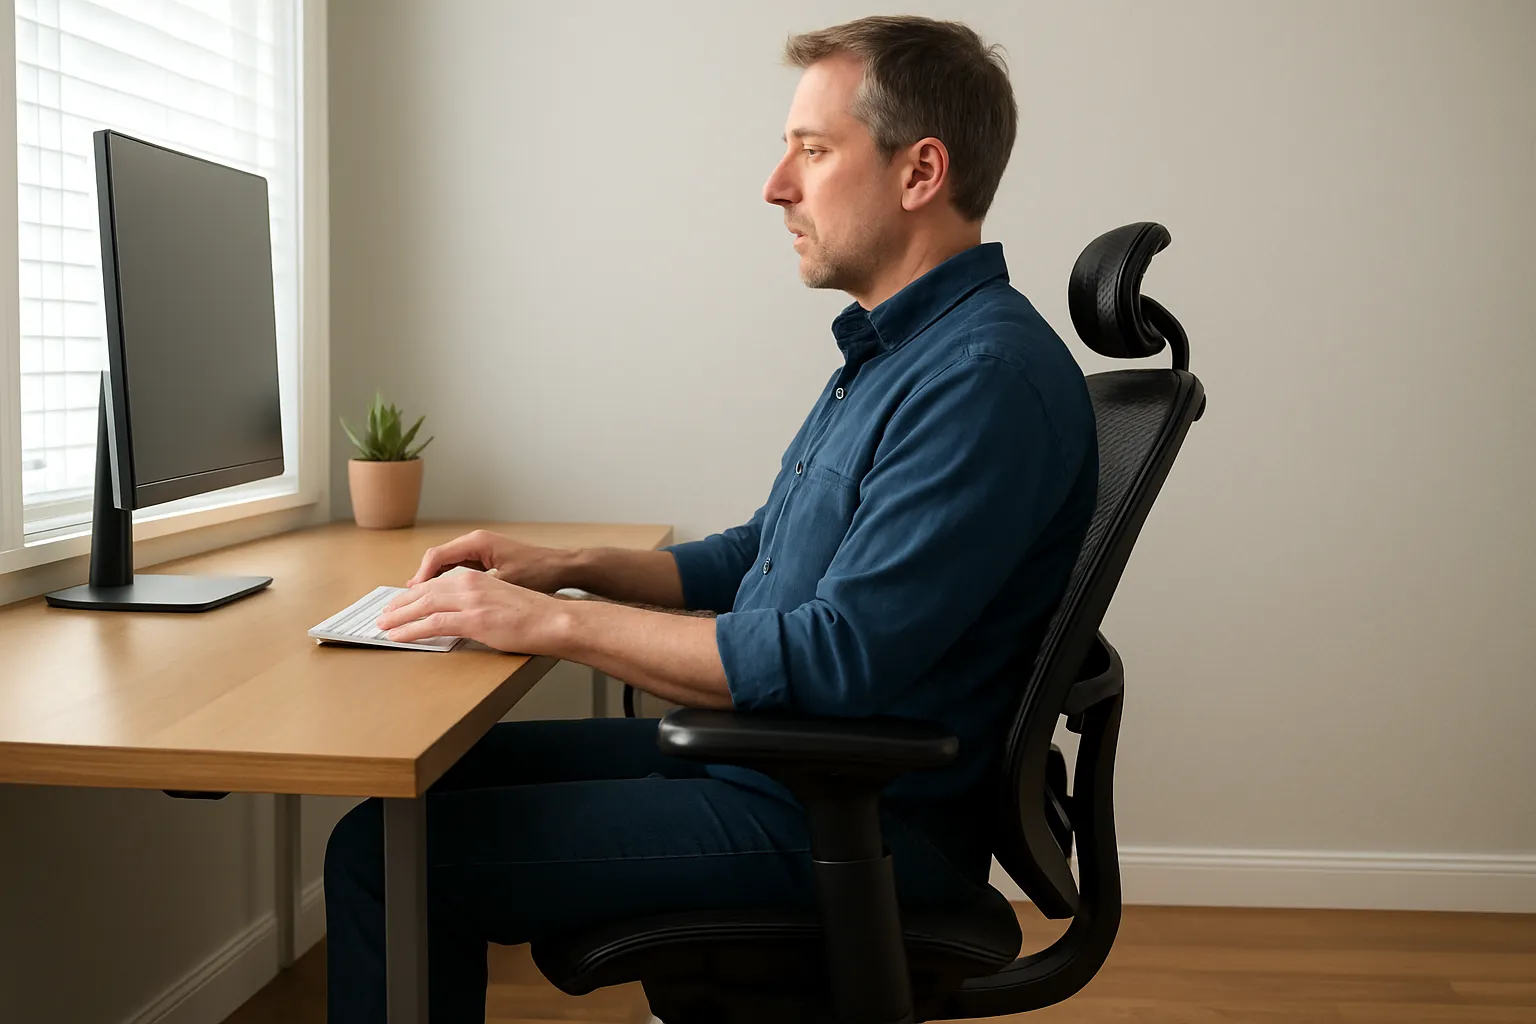
Action step: Before making any changes, take a photo of your current setup from the side. You'll use this to identify problem areas as we work through each adjustment.
Step 1: Position Your Monitor at the Right Height and Distance

Monitor placement affects your neck, shoulders, and eyes more than any other single factor. Get this wrong, and you'll strain muscles all day without realizing it.
The goal: neutral neck position. Your head should balance naturally over your spine, not tilt up or crane forward.
Finding Your Optimal Viewing Angle
Place your monitor directly in front of you, not off to one side. The top of the screen should sit at or slightly below eye level. This creates a natural 20–30 degree downward gaze to the center of your display.
Distance matters too. Position your monitor at arm's length, roughly 20–40 inches from your eyes. If you're squinting or leaning forward to read, move it closer. If text feels overwhelming, push it back.
Here's a quick height reference based on user height:
Your HeightIdeal Desk HeightMonitor Distance5'0"–5'4"26–28 inches20–24 inches5'5"–5'9"28–30 inches24–28 inches5'10"–6'2"30–32 inches26–32 inches
If your monitor doesn't reach the right height, a monitor arm or simple riser solves this immediately.
Single vs. Dual Monitor Placement
For single monitors, center it directly in front of your keyboard. For dual setups, identify your primary screen and center that one. Angle your secondary monitor 15–20 degrees inward.
A common mistake: placing two monitors symmetrically when you use one 80% of the time. This forces constant neck rotation. Center your workhorse screen instead.
Cornell University's ergonomic guidelines recommend checking your monitor position weekly, as subtle shifts happen over time.
Action step: Sit at your desk, close your eyes, and relax your head into a neutral position. Open your eyes. Where does your gaze naturally land? That spot should hit the upper third of your monitor.
Step 2: Set Your Chair for Proper Posture Support
Your chair is the foundation of your ergonomic setup. Even a $1,500 chair becomes a problem if it's adjusted poorly. And a mid-range chair can work beautifully when dialed in correctly.
The target: 90-90-90 alignment. Your hips, knees, and elbows should all form roughly 90-degree angles when you're seated and working.
Adjusting Seat Height and Depth
Start with seat height. Your feet should rest flat on the floor, with thighs parallel to the ground. If your desk is too high for this, a footrest becomes necessary.
Seat depth is often overlooked. When sitting fully back, you should have 1–2 inches of clearance between the edge of your seat pan and the backs of your knees. Too deep, and the seat cuts into your legs. Too shallow, and your thighs lack support.
Dialing In Lumbar and Armrest Settings
Lumbar support preserves your spine's natural curve. Position the lumbar pad (or a rolled towel if your chair lacks one) at the small of your back, roughly at belt level. You shouldn't feel like you're fighting to sit straight.
Armrests deserve more attention than most people give them. Set them so your shoulders stay relaxed while your elbows rest at 90 degrees. Too high, and your shoulders hunch. Too low, and you lean sideways.
Both armrests should sit at the same height as your desk surface. This creates a continuous support plane for your arms.
Researchers at the National Institute for Occupational Safety and Health recommend using their workstation checklist to verify your chair settings.
Action step: Lower your chair until your feet are flat. Then raise it in small increments until your thighs are parallel to the floor. Mark this position with tape on your chair's cylinder.
Step 3: Organize Your Desk Surface to Reduce Reach and Strain

Even with perfect chair and monitor positions, a cluttered or poorly organized desk forces awkward reaching throughout the day. Every time you stretch for your mouse or lean to grab a reference document, you stress your shoulders and spine.
The Ergonomic Work Zone Explained
Think of your desk as three concentric zones:
Primary zone (immediate reach): Items you use constantly belong within 8–12 inches of your resting hand position. This includes your mouse, keyboard, and any tools you touch hourly. Use our ergonomic workstation setup checklist to work through desk organization zone by zone so nothing gets missed.
Secondary zone (extended reach): Items used several times daily but not constantly. Phone, notepad, coffee mug. Keep these within arm's reach without leaning.
Reference zone (occasional reach): Documents, books, or supplies you access occasionally. These can live at the desk's edge or in nearby storage.
Your keyboard and mouse must stay in the primary zone, positioned so your elbows remain close to your body. Reaching forward even 4–6 inches puts significant strain on shoulder muscles over an 8-hour day.
Legroom matters too. Clear space under your desk so you can shift positions, extend your legs, and avoid bumping your knees. A 2019 workplace study found that restricted legroom increased lower back discomfort by 34%.
Watch out for hard desk edges pressing against your forearms. Pad them with a desk edge cushion or use a wrist rest to create a softer transition.
Action step: Clear everything off your desk except your keyboard and mouse. Rebuild your workspace zone by zone, placing items only where they truly need to be.
Step 4: Choose an Ergonomic Mouse That Fits Your Needs
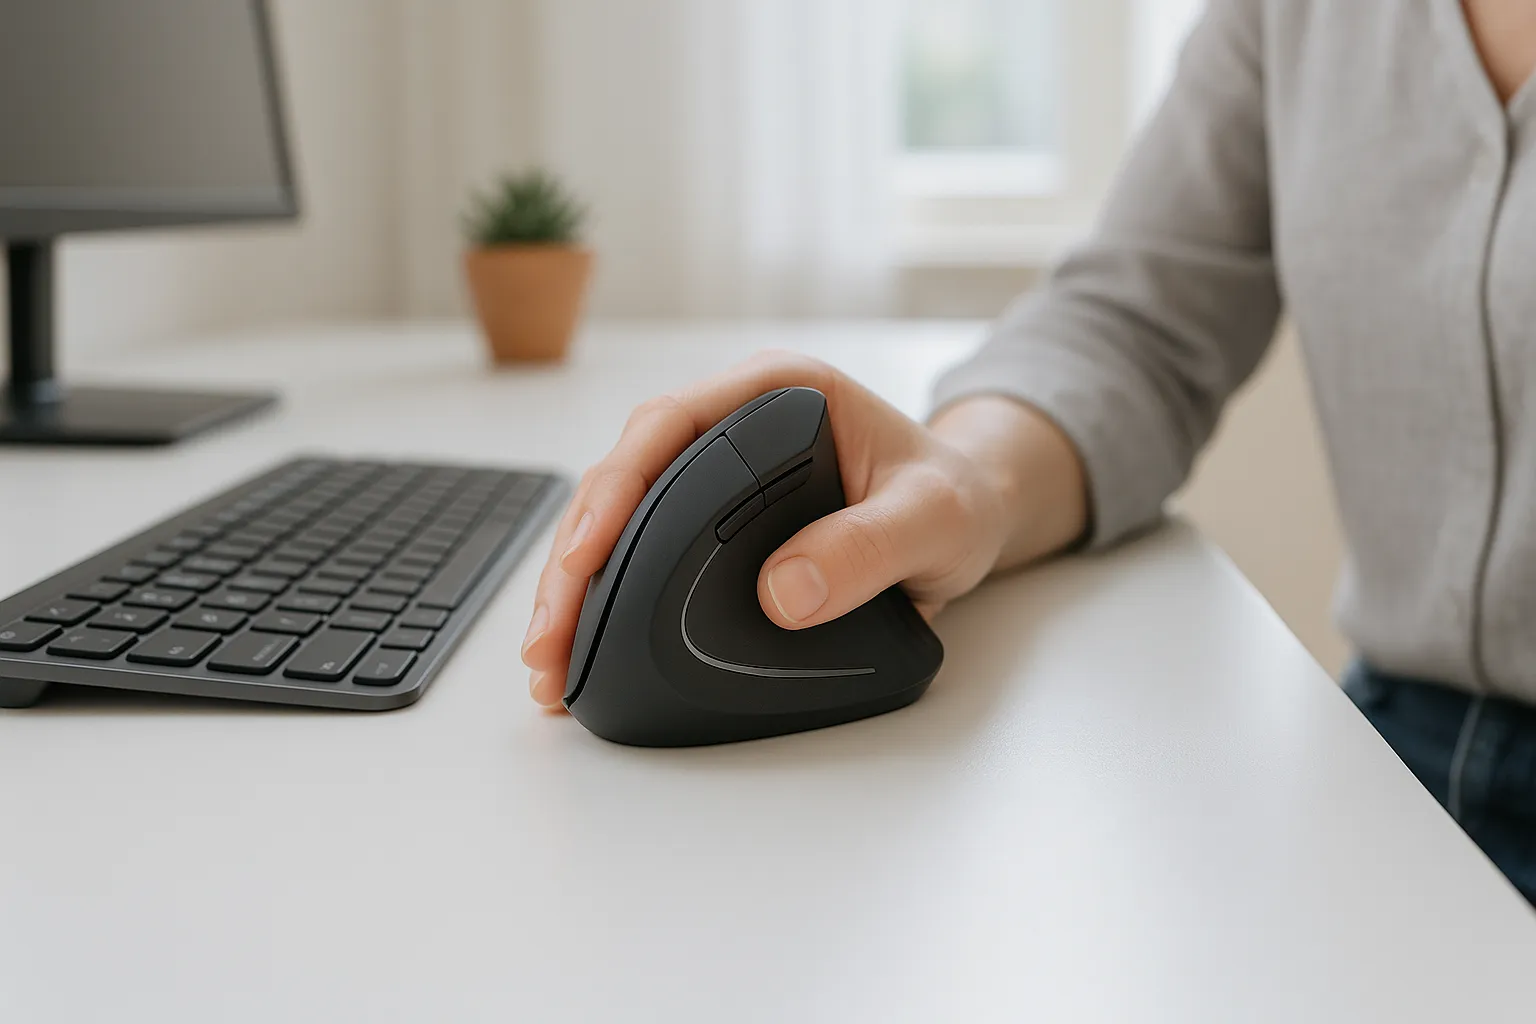
If you've ever felt that dull ache in your forearm after a long work session, your mouse is likely the culprit. Standard mice force your forearm into a pronated (palm-down) position that strains the tendons and muscles on the outside of your arm.
An ergonomic mouse addresses this by promoting a neutral wrist and forearm position, which means less internal rotation and reduced compression on sensitive structures.
Vertical Mice vs. Centered Pointing Devices
Vertical mice rotate your grip to a handshake position, reducing forearm pronation by 60–90 degrees. They're effective for many users but still require side-to-side arm movement.
Centered pointing devices like Contour RollerMouse position in front of your keyboard, keeping both hands within your shoulders' natural width. This eliminates the reaching motion entirely.
Which is better? It depends on your symptoms:
- Wrist pain or carpal tunnel symptoms → Vertical mouse may help
- Shoulder, neck, or upper back strain → Centered device often provides greater relief
- General prevention → Either style improves on standard mice
Why Adjustability Matters for Long-Term Comfort

Here's what most people discover after buying their first ergonomic mouse: one fixed angle doesn't work for everyone. Your ideal wrist position might be 45 degrees. Someone else's might be 70 degrees.
Contour Design's Unimouse offers adjustable angles from 35° to 70°, which means you can fine-tune until you find your personal sweet spot. That customization is the difference between "better" and "actually comfortable." As explained in our article on vertical mouse and productivity, the right mouse setup can significantly reduce strain and improve efficiency.
Look for these features in any ergonomic mouse:
- Light click force (reduces finger strain)
- Appropriate size for your hand
- Programmable buttons (reduces repetitive reaching)
- Same surface level as keyboard
Action step: Measure your hand from wrist crease to middle fingertip. Match this to manufacturer size guides before purchasing any ergonomic mouse.
Step 5: Upgrade to an Ergonomic Keyboard Layout
Your keyboard position and style affect your wrists, forearms, and shoulders. A standard flat keyboard forces wrist extension and ulnar deviation (angling outward toward your pinky), which compresses the carpal tunnel over time.
Position your keyboard directly in front of you, centered with your monitor. Your wrists should float in a neutral position, not bent up, down, or sideways. If your desk height makes this difficult, an ergonomic keyboard riser lets you adjust keyboard height independently and dial in the exact angle your wrists need.
Split, Tented, and Low-Profile Options
Split keyboards divide into two halves, allowing you to position each section at shoulder width. This opens your chest and reduces shoulder internal rotation.
Tented keyboards angle upward in the center, reducing forearm pronation. Some users combine this with a split design for maximum benefit.
Low-profile keyboards sit closer to your desk surface, reducing the degree of wrist extension needed to type. If you can't use a negative tilt keyboard tray, low-profile models are the next best option.
The NIH's ergonomic self-assessment checklist recommends keeping your keyboard at or slightly below elbow height.
Many professionals find that a palm rest (not wrist rest) helps maintain neutral positioning during typing pauses. Rest on the heel of your palm, not your wrist.
Action step: Type a paragraph while watching your wrists. If they angle upward or outward, your keyboard height or style needs adjustment.
Step 6: Fine-Tune Lighting and Reduce Eye Strain
Eye strain doesn't announce itself dramatically. It builds slowly: dry eyes, headaches, blurred vision at the end of the day. Poor lighting is usually the cause.
The enemy is glare. Overhead lights reflecting off your monitor, sunlight streaming across your screen, or insufficient ambient light all force your eyes to work harder.
Position your monitor perpendicular to windows, not facing them directly. If you can't avoid window glare, blinds or an anti-glare screen filter help significantly.
For ambient lighting, aim for indirect, diffused light. Task lamps should illuminate your documents without casting light on your screen. The ideal ratio is 3:1 between your screen brightness and ambient room light.
Cornell's workstation ergonomics checklist provides detailed lighting recommendations you can carry out in any workspace.
Adjust your monitor brightness to match your environment. A screen that's too bright in a dim room causes as much strain as one that's too dim in a bright room.
Action step: Turn off your monitor. If you see clear reflections of lights or windows, reposition either the screen or the light source.
Step 7: Build Movement Into Your Workday

Even the perfect ergonomic desk setup has one limitation: your body isn't designed to hold any position for 8 hours straight. Static posture, no matter how ideal, still creates strain.
The solution isn't just standing desks (though they help). It's regular movement throughout your day. We have a exercise list for you that you can follow during breaks.
Micro-Breaks, Stretching, and Sit-Stand Transitions
Micro-breaks are 20–30 second pauses every 20–30 minutes. Stand up. Shake out your hands. Look at something 20 feet away. These brief interruptions prevent the cumulative strain that causes injury.
Stretching routines don't need to be elaborate. Three movements make a significant difference:
- Chin tucks (10 reps, hold 5 seconds each)
- Chest doorway stretch (30 seconds per side)
- Wrist flexor and extensor stretches (30 seconds each direction)
Sit-stand transitions work best when you alternate every 30–60 minutes. When standing, maintain the same monitor eye-level position. Use an anti-fatigue mat to reduce foot pressure.
Action step: Set a 25-minute timer. When it goes off, stand for 2 minutes before resetting. This simple habit beats any expensive equipment for preventing strain.
Common Ergonomic Mistakes to Avoid
Even well-intentioned setups often include hidden problems. Watch for these frequent errors:
Dangling feet. If your chair is too high for your feet to rest flat, blood pools in your legs and your pelvis tilts forward. Use a footrest rather than compromising your desk height.
Reaching for your mouse. Your mouse should sit immediately next to your keyboard, not 6 inches away on a separate surface. Every inch of reach adds shoulder strain.
Monitor too high. Placing a monitor on a tall stand or stack of books often puts it above eye level. This forces chin-up posture and strains your neck extensors.
Hard desk edges. Leaning forearms against an unpadded desk edge compresses nerves and blood vessels. Cubital tunnel syndrome (the "funny bone" nerve) is particularly sensitive to this pressure.
Ignoring symptoms. Tingling, numbness, or persistent aching aren't normal parts of desk work. These are warning signs that deserve attention before they become injuries.
Learning about the effects of an ergonomically correct workstation can help you understand what proper setup actually feels like.
Action step: Ask a colleague to photograph you working from the side and back. Problem areas are often obvious in photos but invisible when you're focused on your screen.
Your Next Steps Toward a Pain-Free Workspace
You now have the knowledge to build an ideal ergonomic desk setup. The question is whether you'll act on it.
Start with one adjustment today. Just one. Position your monitor correctly, or adjust your chair height, or clear your desk clutter. Small changes compound into significant relief.
If you're already experiencing pain, prioritize your pointing device. For many professionals, switching to a RollerMouse provides the fastest noticeable improvement — it eliminates the sideways reach entirely and keeps both hands centered in front of your body.
Remember: ergonomics isn't a one-time project. Your body changes, your tasks change, and your setup should evolve with them. Revisit these adjustments quarterly to ensure everything still works for you.
Your career depends on your ability to work comfortably for decades. The 30 minutes you invest in proper setup today protects thousands of productive hours ahead.
Frequently Asked Questions
What is the ideal ergonomic desk setup for computer work?
An ideal ergonomic desk setup aligns your chair, desk, monitor, keyboard, and mouse to maintain 90-degree angles at your hips, knees, and elbows. Your feet should rest flat on the floor, the monitor top should sit at eye level, and your wrists should remain neutral to reduce strain on your back, neck, and eyes.
How high should my monitor be for proper ergonomics?
Position your monitor so the top of the screen sits at or slightly below eye level, creating a natural 20–30 degree downward gaze to the screen's center. Place it at arm's length (20–40 inches) directly in front of you. For users 5'5"–5'9", optimal monitor distance is typically 24–28 inches.
Why does an ergonomic desk setup matter for long-term health?
Poor desk ergonomics forces compensatory postures like slouching and forward head position, leading to back pain, neck strain, carpal tunnel syndrome, and shoulder tension. Workers with untreated repetitive strain injuries lose an average of 23 productive workdays annually, and treatment costs often reach $1,500–$3,000.
How often should I take breaks when working at a desk?
Take micro-breaks of 20–30 seconds every 20–30 minutes to stand, stretch, and rest your eyes. If using a sit-stand desk, alternate positions every 30–60 minutes. These brief movement breaks prevent cumulative strain and reduce injury risk more effectively than any single piece of ergonomic equipment.
What type of ergonomic mouse is best for wrist pain?
Vertical mice are often effective for wrist pain and carpal tunnel symptoms because they rotate your grip to a handshake position, reducing forearm pronation by 60–90 degrees. Look for adjustable models with light click force that match your hand size and sit at the same surface level as your keyboard.
How do I set my office chair height correctly?
Adjust your chair so your feet rest flat on the floor with thighs parallel to the ground and knees bent at 90 degrees. Leave 1–2 inches between the seat edge and the back of your knees. Set armrests so shoulders stay relaxed while elbows rest at 90 degrees, level with your desk surface.

Which Device Is Right for You?
Take a quick quiz and get a personalized recommendation based on how you work.
