
Laptop Posture Stand: Your Guide to a Pain-Free, Productive Workspace
A laptop posture stand can transform your daily work experience from hunched discomfort to relaxed productivity. If you've ever finished an 8-hour workday with a stiff neck, aching shoulders, or that dull throb between your shoulder blades, your flat laptop setup is likely the culprit.
Here's the uncomfortable truth: laptops were designed for portability, not ergonomics. That sleek, compact design forces you into positions your body wasn't built to hold for hours. The good news? A simple elevation change can make a dramatic difference. Studies show laptop stands reduce neck strain by up to 32%, which means less pain and more focused work time.
This guide walks you through why your current setup is causing problems, how the right stand fixes them, and exactly how to create a workspace that supports your body instead of fighting it.
Key Takeaways
- A laptop posture stand can reduce neck strain by up to 32% by raising your screen to eye level, keeping your head balanced over your spine.
- Always pair your laptop stand with an external keyboard and mouse—using the stand alone forces awkward shoulder positions that create new strain.
- Look for height and angle adjustability as the most important features, with at least 4-6 inches of elevation range to match your body and desk setup.
- Position your screen so the top edge aligns with your natural forward gaze, at a distance of 45-70cm (18-28 inches) from your eyes.
- Expect an adjustment period of 2-3 weeks as your body relearns proper posture after years of hunching over a flat laptop.
- Review your setup regularly—different tasks may require small adjustments, and catching discomfort early prevents bigger problems.
Why Your Laptop Setup Is Working Against Your Posture

Picture yourself right now at your desk. Chances are, your laptop sits flat on the surface, and you're craning your neck downward to see the screen. Your shoulders round forward. Your spine curves into a C-shape.
This isn't a character flaw. It's physics. When your screen sits 6-8 inches below eye level, your head tilts forward to compensate. And here's the kicker: your head weighs about 10-12 pounds. For every inch it shifts forward, the effective load on your neck muscles increases dramatically.
Flat desk laptop use creates a cascade of strain:
- Neck muscles work overtime to hold your head in position
- Shoulders hunch forward, tightening chest muscles
- Upper back rounds, compressing spinal discs
- Eyes strain from close proximity and screen glare
After 6-10 hours of this daily, your body starts sending distress signals. First it's occasional stiffness. Then persistent aches. Eventually, for some, diagnosed repetitive strain injuries.
The Strain of Looking Down All Day
Medical professionals call it "tech neck" or "text neck." It's the modern epidemic of cervical spine strain caused by prolonged downward screen viewing.
The numbers tell the story. According to ergonomics research from Cornell University, proper monitor positioning significantly reduces musculoskeletal discomfort. When your gaze drops 30-45 degrees to view a flat laptop, you're essentially doing a sustained neck exercise you never signed up for.
I learned this the hard way during my first year of remote work. By month six, I was visiting a physical therapist twice weekly for neck pain that radiated into my right shoulder. The culprit wasn't my chair, my desk, or my mattress. It was the 13-inch laptop I'd been hunching over for 50+ hours a week.
Action step: Right now, notice where your screen sits relative to your eyes. If you're looking down more than 10-15 degrees, your setup needs adjustment. This awareness is the first step toward fixing the problem.
How a Laptop Stand for Posture Makes a Difference
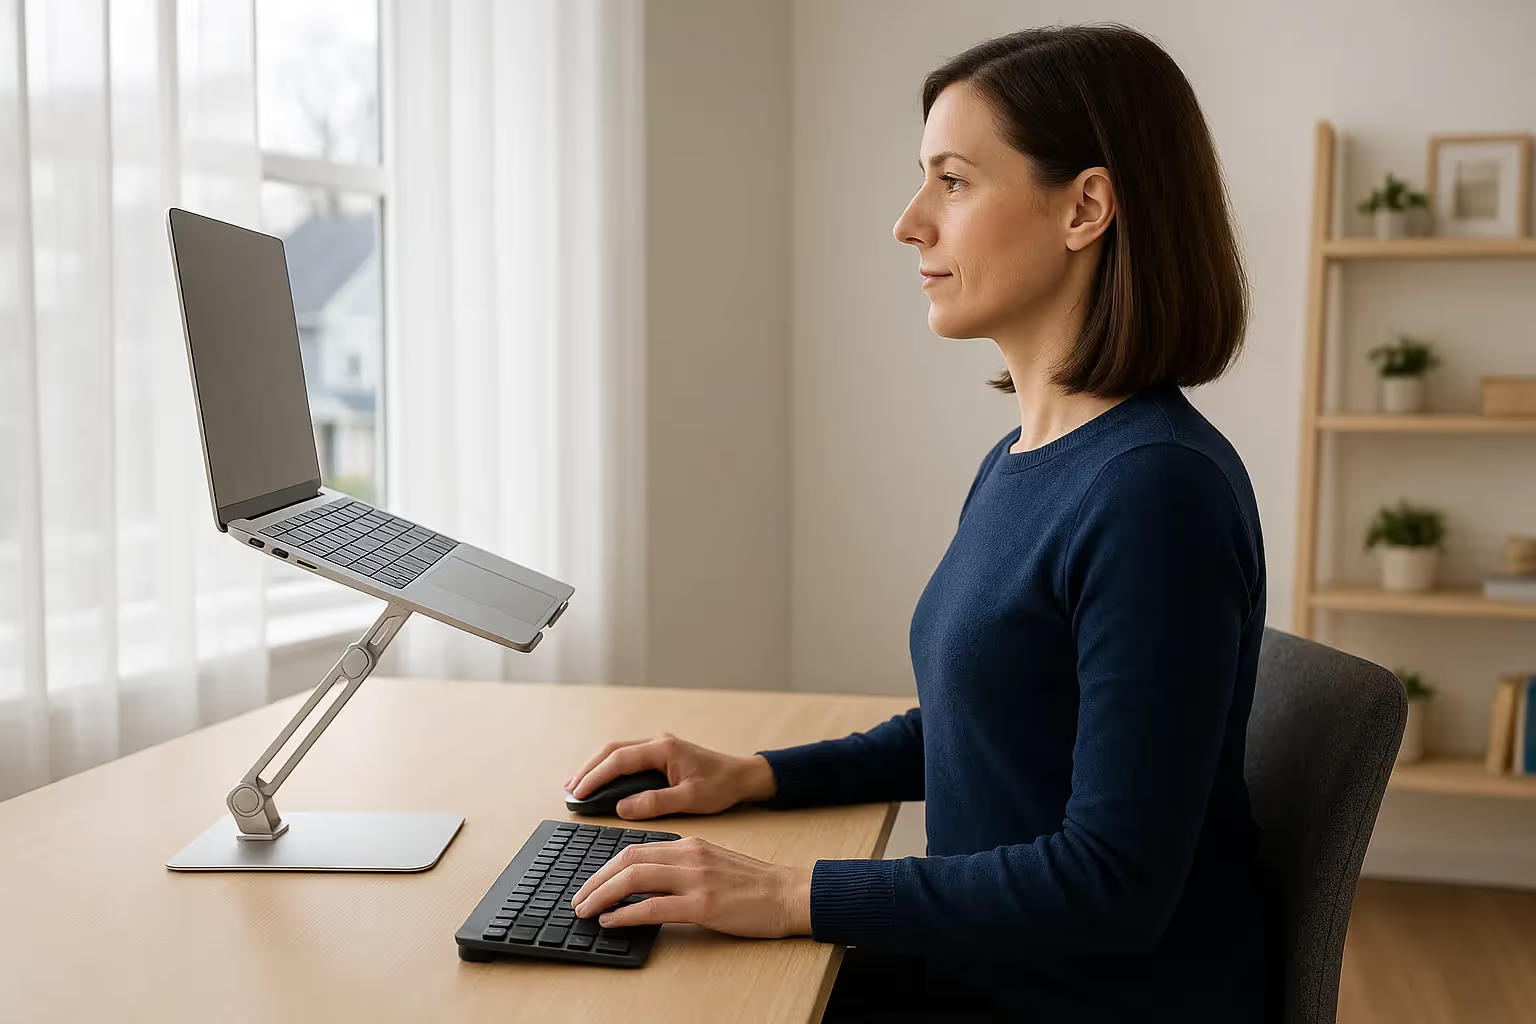
A laptop stand for posture does one essential thing: it brings your screen up to where your eyes naturally rest. This single change triggers a chain reaction of ergonomic benefits.
When your screen top sits at or slightly below eye level, your head stays balanced over your spine. Your neck muscles can relax. Your shoulders drop back naturally. Suddenly, sitting upright feels easy instead of effortful.
The measurable benefits include:
- Reduced neck strain: Up to 32% decrease in cervical muscle tension
- Better breathing: Upright posture opens chest cavity
- Improved airflow: Elevated laptops run cooler, extending device life
- Less eye fatigue: Optimal viewing distance of 45-70cm reduces strain
- Enhanced focus: Comfort translates to longer productive work sessions
But here's what surprised me most when I started using a stand: the productivity boost. I expected less pain. I didn't expect to feel more alert, more engaged, and less drained at the end of each day. Turns out, when your body isn't fighting poor positioning, your brain has more resources for actual work.
Our article on how to create the ideal ergonomic desk setup recommends positioning your monitor so the top of the screen aligns with your natural forward gaze.
Who benefits most: Knowledge workers logging 6+ hours daily on laptops. Software developers. Writers. Designers. Accountants. Anyone whose income depends on screen time.
Who might not need this: If you use a laptop only occasionally for light tasks, or if you already have an external monitor at proper height, a stand may be less critical.
Action step: Measure from your desk surface to your current screen top. Then measure from the desk to your eye level while seated with good posture. The difference tells you how much elevation you need.
Key Features to Look for in a Laptop Posture Stand
Not all laptop stands deliver equal ergonomic value. The difference between a cheap plastic riser and a properly engineered stand often shows up in your body six months later.
Height and Angle Adjustability
This is the feature that matters most. Your ideal screen height depends on your torso length, chair height, and desk dimensions. A fixed-height stand might work for one person and be useless for another.
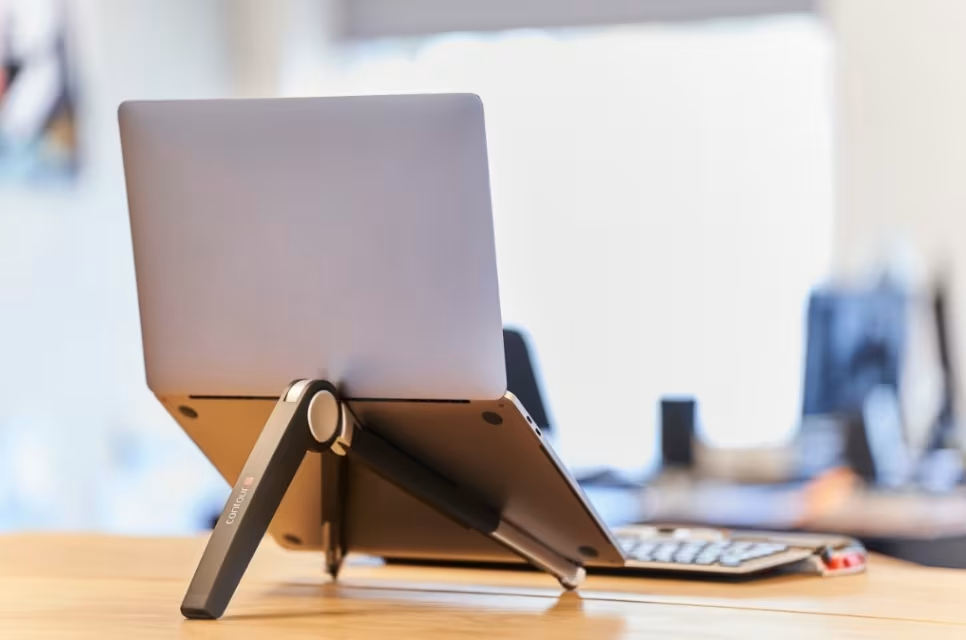
Look for stands offering multiple height positions or continuous adjustment. The Contour Laptop Stand exemplifies this approach, providing adjustable settings that accommodate different body types and desk setups.
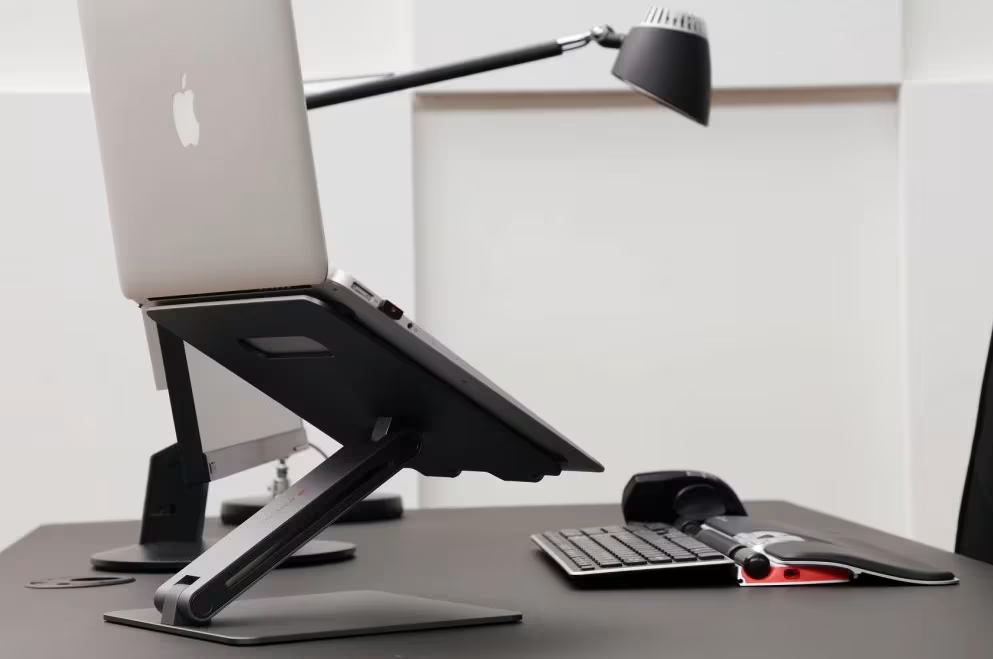
Angle adjustment matters too. Tilting your screen reduces glare from overhead lighting and windows. A 10-15 degree backward tilt often creates the clearest viewing angle.
Specific features to prioritize:
- Minimum 4-6 inches of height range
- At least 3 height settings (more is better)
- Tilt adjustment of 10-20 degrees
- Easy adjustment without tools
Stability and Build Quality
A wobbly stand defeats the purpose. Every time you type and your screen shakes, your eyes strain to track the movement. Over an 8-hour day, that adds up.
Quality stands use aluminum, steel, or reinforced composites. They grip your laptop securely with rubberized surfaces or mechanical stops. They don't slide across your desk when you reach for the trackpad.
Test for stability by asking:
- Does it hold laptops from 13" to 17" securely?
- Is there any wobble when typing on the laptop keyboard?
- Will it travel well if you work from multiple locations?
Portability matters for hybrid workers. A stand that folds flat or collapses saves space in your bag. But don't sacrifice stability for portability if you primarily work from one location.
Action step: Before purchasing, check the weight capacity and laptop size compatibility. Your 16-inch MacBook Pro has different needs than a 13-inch ultrabook. Match the stand to your actual device.
Setting Up Your Laptop Stand for Optimal Ergonomics
Owning a laptop posture stand is step one. Setting it up correctly unlocks the actual benefits.
Follow this sequence for proper positioning:
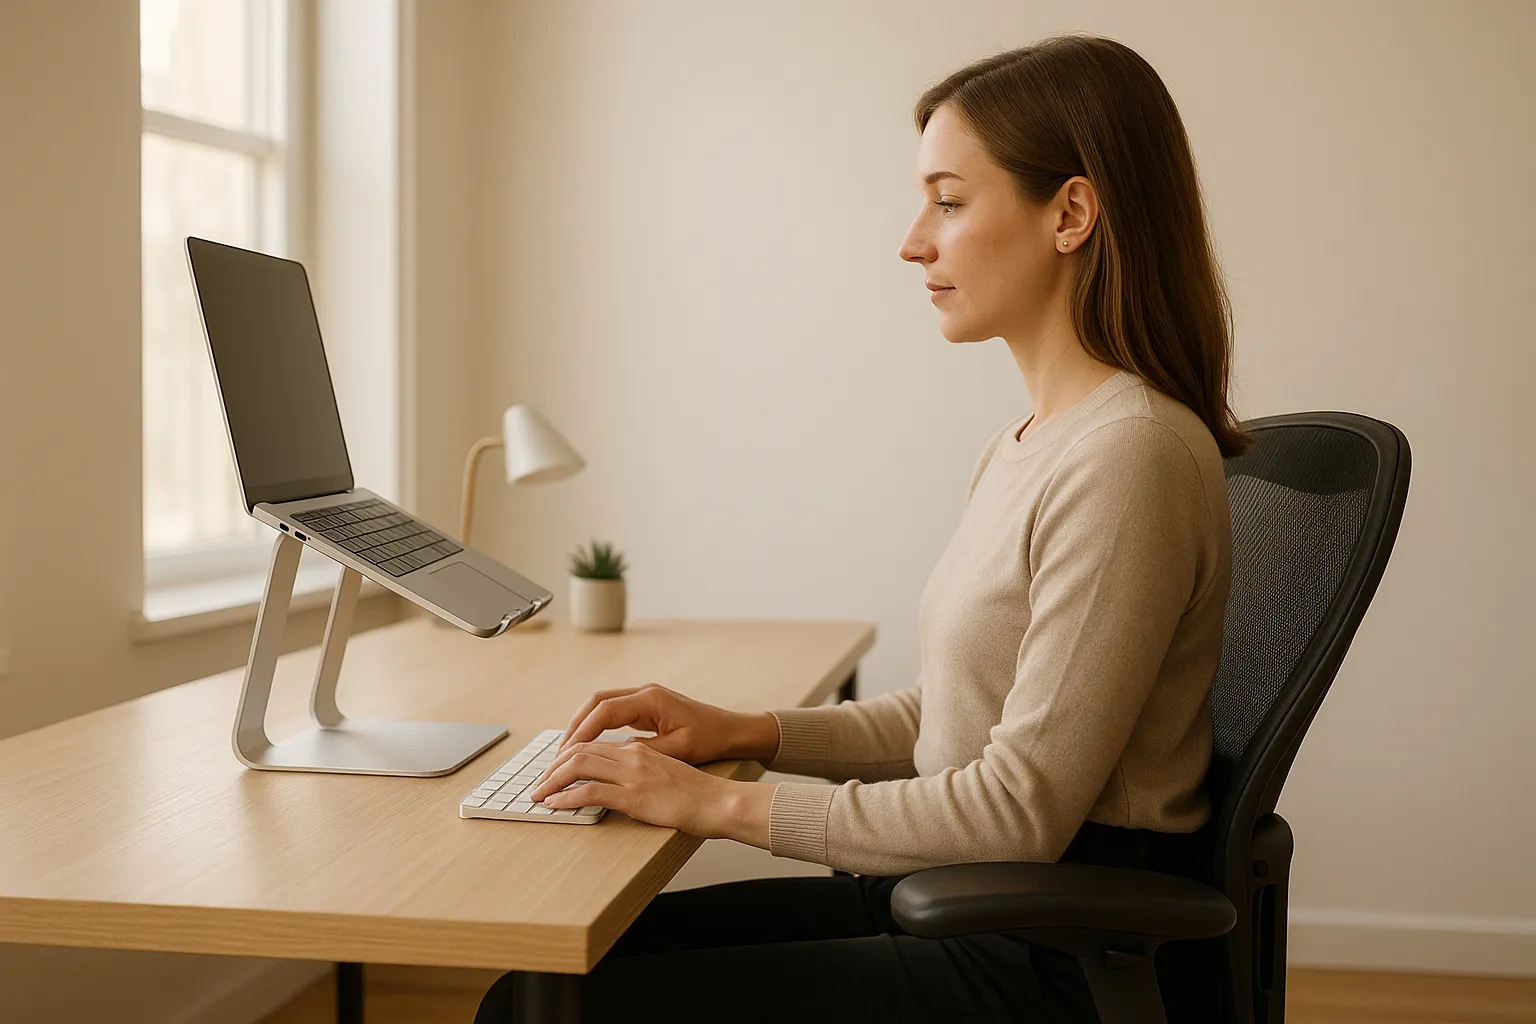
1. Position your screen at eye level
Sit in your chair with your back against the backrest and feet flat on the floor. Look straight ahead. Adjust your stand height until the top edge of your laptop screen aligns with your natural forward gaze. Most people need 4-8 inches of elevation.
2. Set the correct viewing distance
Your screen should sit 45-70cm (roughly 18-28 inches) from your eyes. Extend your arm forward. Your fingertips should just touch the screen. This distance reduces eye strain while keeping text readable.
3. Adjust the tilt to eliminate glare
Tilt your screen backward slightly until overhead lights no longer reflect off the display. A 10-15 degree angle works for most lighting conditions.
4. Check your posture baseline
With the stand positioned, your body should naturally settle into:
- Head balanced over shoulders, not jutting forward
- Shoulders relaxed, not hunched
- Upper arms hanging straight down
- Elbows at roughly 90 degrees when using keyboard
Here's an honest admission: the first week with a properly elevated screen feels weird. You've trained your body to hunch for years. Good posture initially requires conscious effort. Stick with it. Within 2-3 weeks, the new position becomes automatic.
The CDC's computer workstation checklist provides additional verification points for your setup.
Action step: Set a daily reminder for your first week to check your posture against these criteria. Adjustment becomes habit faster with deliberate attention.
Pairing Your Stand With Ergonomic Peripherals
A laptop stand solves the screen height problem. But it creates a new one: your keyboard and trackpad are now elevated too, forcing your arms into an awkward upward reach.
The solution is external input devices.
An external keyboard positioned at desk level keeps your elbows at 90 degrees and your wrists neutral. An external mouse eliminates the cramped trackpad posture that contributes to wrist strain.
This combination transforms your laptop into a proper workstation:
- Screen at eye level (via stand)
- Keyboard at elbow level (external, on desk)
- Mouse at same level as keyboard (external, beside keyboard)
If you’re building a more complete setup, our guide to essential ergonomic office accessories for a pain-free workday walks through the most impactful upgrades beyond a laptop stand.
Smart peripheral choices include:
- Ergonomic keyboard: Split or tented designs reduce ulnar deviation
- Vertical or centered mouse: Reduces forearm rotation strain
- Wrist rest: Supports neutral wrist position during pauses
For professionals dealing with existing RSI symptoms, a comprehensive approach often works best. The Contour Travel Kit bundles a laptop stand with ergonomic input devices, creating a complete mobile workstation.
Consider adding a sit-stand desk to your setup. Alternating between sitting and standing every 30-60 minutes reduces static loading on your spine. Even a simple desktop converter creates this option.
Warning: Using a laptop stand without external keyboard and mouse often makes ergonomics worse, not better. You end up reaching up and forward to type, straining shoulders in a new way.
Action step: If you're purchasing a laptop stand, budget for an external keyboard and mouse at the same time. The stand alone is only half the solution.
Common Mistakes to Avoid When Using a Laptop Stand
I've watched colleagues buy laptop stands, use them for a week, then abandon them on a shelf. Usually, one of these mistakes is the culprit.
Mistake #1: Using the stand without external input devices
This is the most common error. You elevate your screen beautifully, then hunch over to reach the built-in keyboard. Net result: you've traded neck strain for shoulder strain. Neither is an improvement.
Fix: Always pair your stand with external keyboard and mouse. No exceptions.
Mistake #2: Setting the height incorrectly
Many people set their stand too high or too low, then wonder why they still feel uncomfortable. "Eye level" doesn't mean center of screen at eye level. It means top of screen at or slightly below eye level.
Fix: Adjust height while seated in your working posture, not standing beside your desk.
Mistake #3: Ignoring laptop size compatibility
That beautiful aluminum stand designed for 13-inch ultrabooks won't securely hold your 17-inch workstation laptop. Overhang creates instability. Wrong fit creates wobble.
Fix: Check weight limits and size ranges before purchasing. Your stand should match your actual laptop.
Mistake #4: Forgetting about ventilation
Some stands block laptop vents, causing overheating. Others create poor airflow patterns. An overheating laptop throttles performance and shortens component life.
Fix: Choose open-design stands that allow air circulation beneath your laptop.
Mistake #5: Setting it and forgetting it
Your needs change. Different tasks require different postures. A stand set perfectly for writing may feel wrong during video calls.
Fix: Adjust your setup periodically. Notice when discomfort creeps back, and troubleshoot the cause.
Action step: Review your current setup against this mistake list. Be honest about which ones might apply to you.
Conclusion
Your laptop posture stand isn't just another desk accessory. It's a tool that protects your ability to work comfortably for years to come.
The math is simple: 8 hours daily, 250 workdays yearly, multiplied by decades of career ahead. That's thousands of hours your body spends in whatever position your workspace dictates. A proper stand positions you for comfort rather than strain.
Start with the basics. Elevate your screen to eye level. Add external keyboard and mouse. Adjust until your body settles into neutral alignment without effort. These changes take 30 minutes to carry out and pay dividends every working day after.
Your future self, the one without chronic neck pain or repetitive strain injury, will thank you for making ergonomics a priority today.
Frequently Asked Questions
How does a laptop posture stand reduce neck strain?
A laptop posture stand elevates your screen to eye level, eliminating the need to crane your neck downward. Studies show this can reduce cervical muscle tension by up to 32%, preventing 'tech neck' and the chronic pain caused by prolonged downward screen viewing.
What height should I set my laptop stand for proper ergonomics?
Position your laptop stand so the top edge of your screen aligns with your natural forward gaze when seated upright. Most people need 4–8 inches of elevation. The screen should also sit 45–70cm (18–28 inches) from your eyes for optimal viewing comfort.
Do I need an external keyboard with a laptop posture stand?
Yes, using an external keyboard is essential. Elevating your laptop without one forces you to reach upward to type, trading neck strain for shoulder strain. Pair your stand with an external keyboard and mouse positioned at desk level for proper 90-degree elbow alignment.
What features should I look for when buying a laptop stand for posture?
Prioritize height and angle adjustability for a custom eye-level fit, stability with rubberized grips to prevent wobble, and an open design that allows proper laptop ventilation. Ensure the stand supports your laptop's size and weight for secure positioning.
Can a laptop stand help with productivity, not just comfort?
Absolutely. When your body isn't fighting poor positioning, your brain has more resources for focused work. Users report feeling more alert, engaged, and less drained at day's end—comfort directly translates to longer, more productive work sessions.
What is tech neck and how can I prevent it?
Tech neck is cervical spine strain caused by prolonged downward screen viewing. Prevent it by using a laptop posture stand to raise your screen to eye level, taking regular breaks, and maintaining neutral head-over-spine alignment throughout your workday.

Which Device Is Right for You?
Take a quick quiz and get a personalized recommendation based on how you work.
