
How to Set Up an Ergonomic Standing Desk—A Step-by-Step Guide for Pain-Free Productivity

An ergonomic standing desk setup can eliminate the neck pain, shoulder tension, and wrist strain that plague office workers after years of poor positioning. But here's the thing: buying a standing desk won't fix your problems. I've seen engineers spend $2,000 on motorized desks only to end up with worse back pain than before.
The desk is just furniture. It’s your overall setup that determines whether you'll feel energized at 5 PM or collapse into the couch with a heating pad. In this guide, you'll learn exactly how to position every element of your workstation for genuine comfort. Each step includes specific measurements, real-world adjustments, and the "why" behind each recommendation.
Key Takeaways
- A proper ergonomic standing desk setup matters more than the desk itself—correct positioning beats expensive equipment every time.
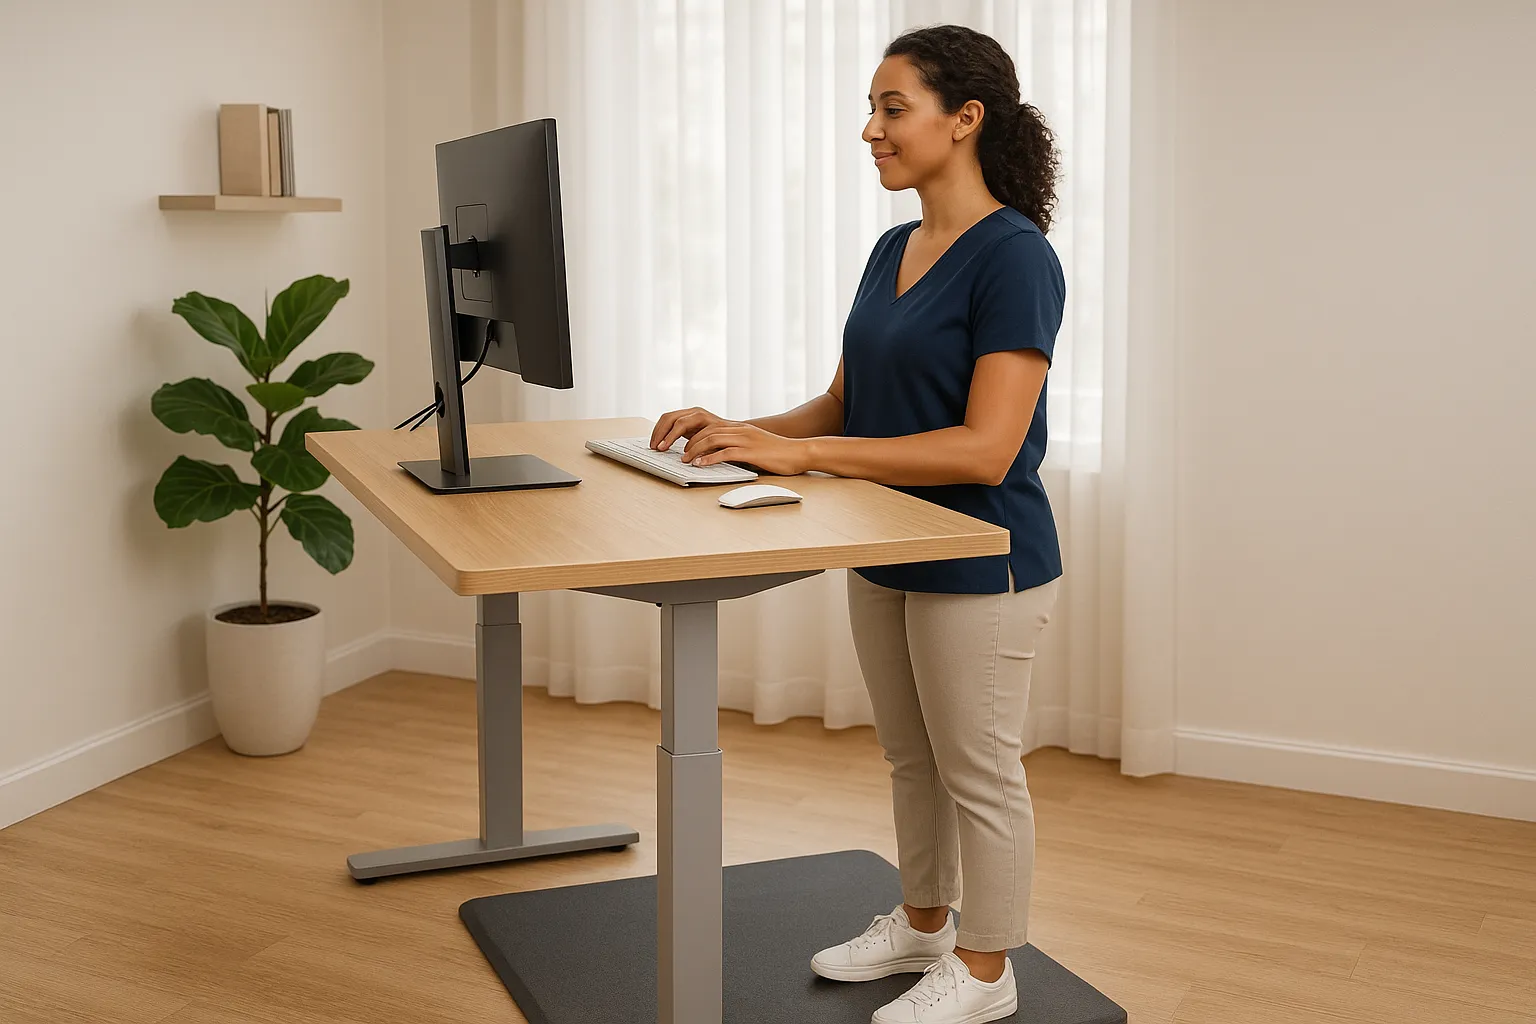
- Set your desk height so your elbows bend at 90 degrees with forearms parallel to the surface and your shoulders are relaxed.
- Position your monitor so the top edge aligns with eye level, placed at arm’s length (about 20–30 inches away) to prevent neck strain and eye fatigue.
- Keep your keyboard flat with the B key centered in front of you and your mouse immediately adjacent to avoid wrist and shoulder strain.
- Follow the 20-20-20 rule: alternate between 20 minutes standing, 20 minutes sitting, and 20 minutes of movement throughout your workday.
- Use an anti-fatigue mat (at least 3/4 inch thick) and supportive footwear to reduce joint stress while standing.
Why Your Standing Desk Setup Matters More Than the Desk Itself

A $400 standing desk with proper ergonomics beats a $3,000 desk with sloppy positioning every time. Research from the Canadian Centre for Occupational Health and Safety confirms that incorrect standing desk height causes shoulder strain, neck stiffness, and postural problems that accumulate over months.
The numbers tell the story. Workers with optimized standing desk setups report:
- 33% less neck and back discomfort compared to traditional sitting
- Reduced afternoon fatigue during the 2-4 PM energy dip
- Improved focus during complex tasks requiring sustained attention
But flip those benefits around and you see the risk. Standing with your desk at the wrong height for 8 hours creates more stress on your spine than sitting ever did. Your monitor angle matters. Your keyboard placement matters. Your mouse position really matters if you're already dealing with wrist strain.
Think of your ergonomic standing desk setup as a system, not a single purchase. Each component affects the others. Get one element wrong and the whole system breaks down.
I once worked with a software developer who'd been standing for 18 months with his monitor 6 inches too low. He thought the headaches were from screen time. They were from tilting his chin down 15 degrees for 50 hours weekly. Three adjustments later, the headaches disappeared.
Your action step: Before touching your desk, take a photo of your current setup from the side. You'll reference this as you work through each step below.
Step 1: Position Your Standing Desk at the Right Height
Desk height is the foundation of your ergonomic standing desk setup. Every other adjustment depends on getting this right first.
Find Your Ideal Elbow Angle
Stand naturally with your arms relaxed at your sides. Now bend your elbows to 90 degrees. Where your forearms meet the air Then, raise the desk just enough to support your arms and shoulders. That's your desk height.
Here are recommended heights based on stature:
Your HeightDesk Surface HeightUnder 5'5"36–38 inches5'6"–6'0"39–42 inchesOver 6'1"43–47 inches
When positioned correctly, your forearms should firmly rest parallel to on the desk surface. Your shoulders stay relaxed, not hunched up toward your ears. Your wrists remain neutral, not bent upward or downward.
Many people set their desks too high. This forces shoulders into a perpetual shrug position. After 2-3 hours, you'll feel tension building between your shoulder blades. That tension becomes chronic if you ignore it.
Adjust for Shoes and Anti-Fatigue Mats
That perfect elbow angle changes when you add footwear. Running shoes add about 1 inch of height. Anti-fatigue mats add another 0.5-1 inch depending on thickness.
Make your final height adjustment while wearing your typical work shoes and standing on your mat. Measure in your actual working conditions, not barefoot on hardwood.
For a comprehensive view of proper positioning, check out this visual guide to ergonomic desk setup that shows all angles clearly.
Your action step: Set your desk to elbow height right now while wearing your work shoes. Spend 30 minutes working at this height before moving to Step 2.
Step 2: Set Up Your Monitor for Neck and Eye Comfort

Your monitor position determines whether you'll end each day with a stiff neck or a relaxed spine. Most standing desk users position their screens too low, forcing their heads into a forward tilt that strains neck muscles.
Optimal Screen Height and Distance
The Mayo Clinic's office ergonomics guide recommends positioning your monitor so the top edge aligns with or sits slightly below eye level. This allows your eyes to naturally scan downward while keeping your head balanced over your spine.
Distance matters equally. Place your screen 20-30 inches from your eyes (roughly arm's length). Too close causes eye fatigue. Too far forces you to lean forward, ruining your posture.
For dual monitor setups, position your primary screen directly in front of you. Angle the secondary monitor at to 30 degrees inwards to one side. If you use both screens equally, center the gap between them in front of your nose.
Reduce Glare and Eye Strain
Glare forces you to squint, tilt your head, or adjust your posture to see clearly. Position your screen perpendicular to windows, never facing them or with windows behind you.
Consider these anti-glare strategies:
- Adjust brightness to match your ambient lighting
- Use bias lighting behind your monitor to reduce contrast
- Enable blue light filters after 6 PM
Laptops create problems for standing desk users because the screen and keyboard are connected. You'll crane your neck down to see the display. Use an external monitor or laptop stand with a separate keyboard and mouse instead.
Your action step: Stand at your desk and close your eyes. Open them naturally. Your gaze should land on the top third of your screen without any head movement. Adjust your monitor arm or stack until it does.
Step 3: Choose and Place Ergonomic Input Devices

Your keyboard and mouse placement directly impacts wrist, forearm, and shoulder comfort. According to the Cleveland Clinic's ergonomic guidelines, improper input device positioning causes cumulative strain that leads to chronic conditions. Select devices that promote a neutral wrist and forearm posture - such as an adjustable vertical mouse like the Unimouse - and position them so your elbows remain close to your body, your wrists stay straight, and your shoulders are relaxed.
Position Your Keyboard for Neutral Wrists
Your keyboard should sit at a height where your forearms are parallel to the floor with wrists straight, not angled up or down. Most people position keyboards too high, causing wrist extension that strains the carpal tunnel area.
Key positioning rules:
- Center the B key in front of your belly button, not the keyboard's physical center
- Keep elbows close to your body rather than reaching forward
- Tilt the keyboard flat or slightly negative (front edge higher than back)
That little kickstand on the back of your keyboard? It creates wrist extension. Keep it flat or use a keyboard that has adjustable tilt if possible.
Keep Your Mouse Close and Centered
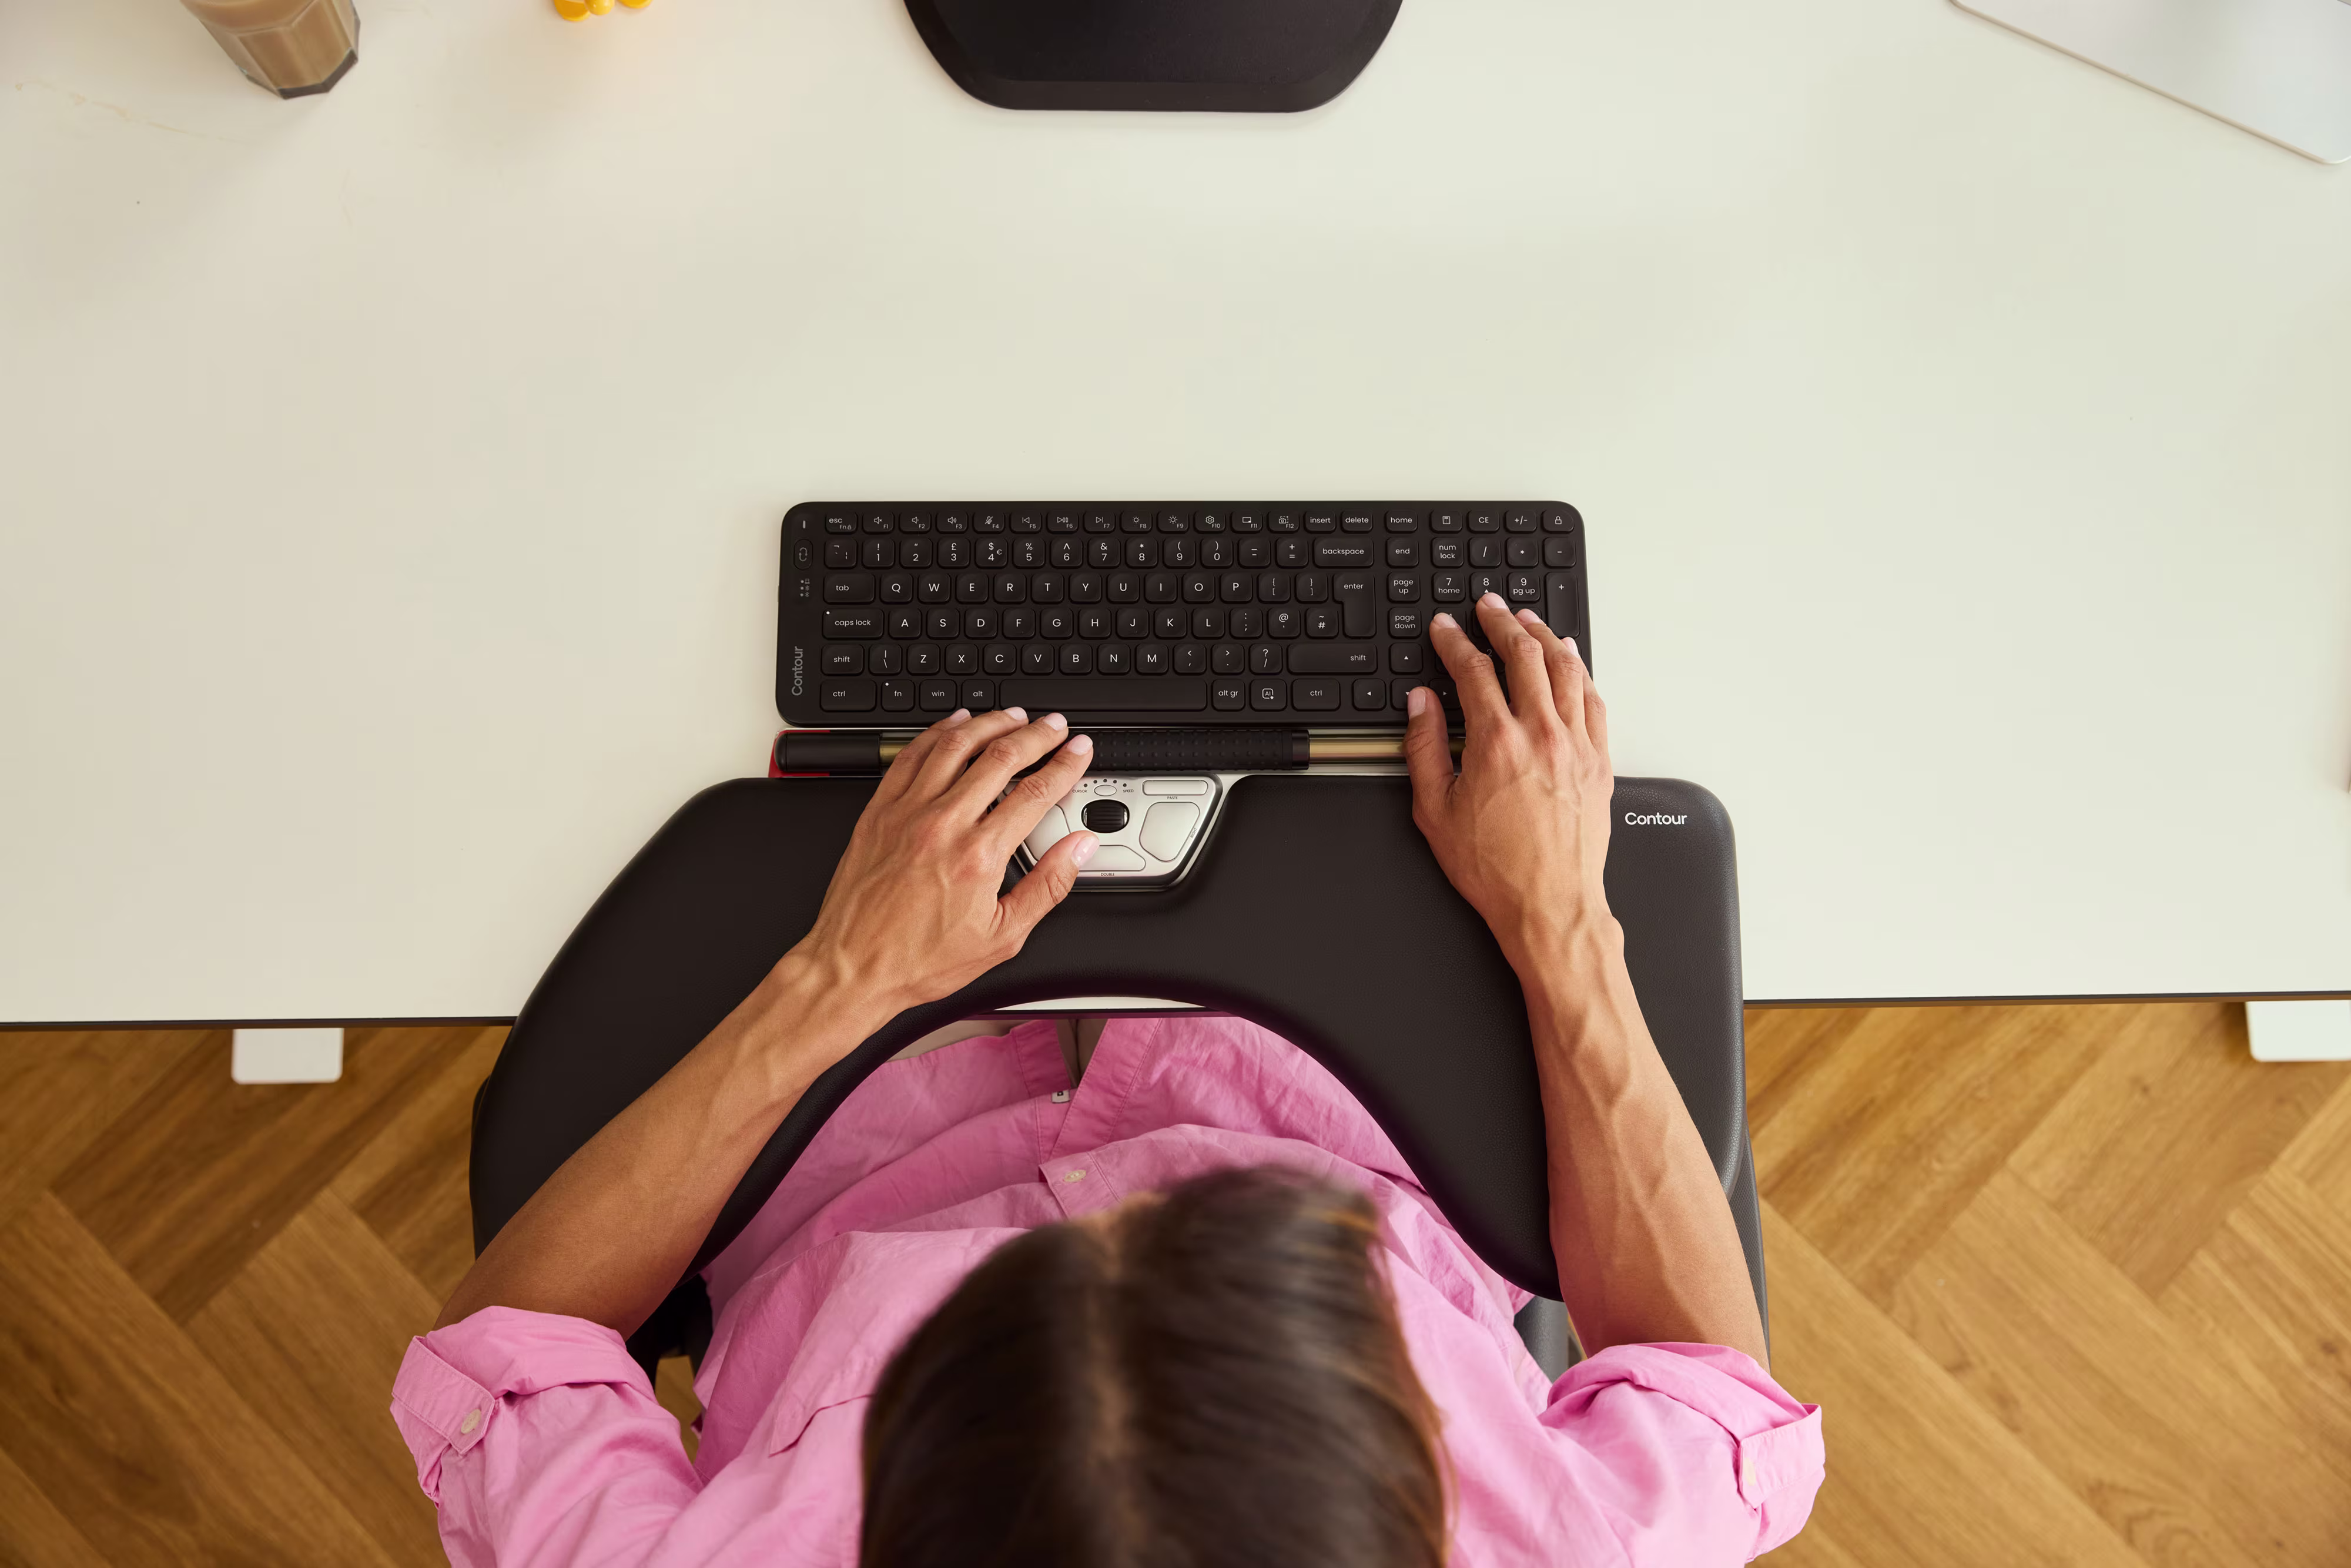
Reaching for your mouse creates shoulder rotation and arm extension that accumulates into real pain. Position your mouse immediately adjacent to your keyboard, at the same height.
Traditional mice force your forearm into an unnatural palm-down position called pronation. This strains the muscles that run from your elbow to your wrist. Products like the Contour RollerMouse eliminate this problem by centering the pointing device directly in front of you, keeping your hands in a neutral position.
If you use a standard mouse, consider alternating between left and right hands weekly. This distributes the repetitive stress across both arms.
Your action step: Place your keyboard so the B key aligns with your navel. Position your mouse so you can reach it without extending moving your elbow away from your ribs.
Step 4: Support Your Body While Standing
Standing still is not the goal. Your body needs movement, support, and periodic rest to thrive at a standing desk.
Use an Anti-Fatigue Mat
Concrete and hardwood floors send impact forces through your joints with every micro-movement. An anti-fatigue mat absorbs this stress and encourages subtle weight shifts that keep blood flowing.
Good anti-fatigue mats share these qualities:
- 3/4 inch thickness minimum for adequate cushioning
- Beveled edges to prevent tripping
Research published in PMC journals confirms that excessive static standing creates fatigue similar to excessive sitting. The mat helps, but movement matters more.
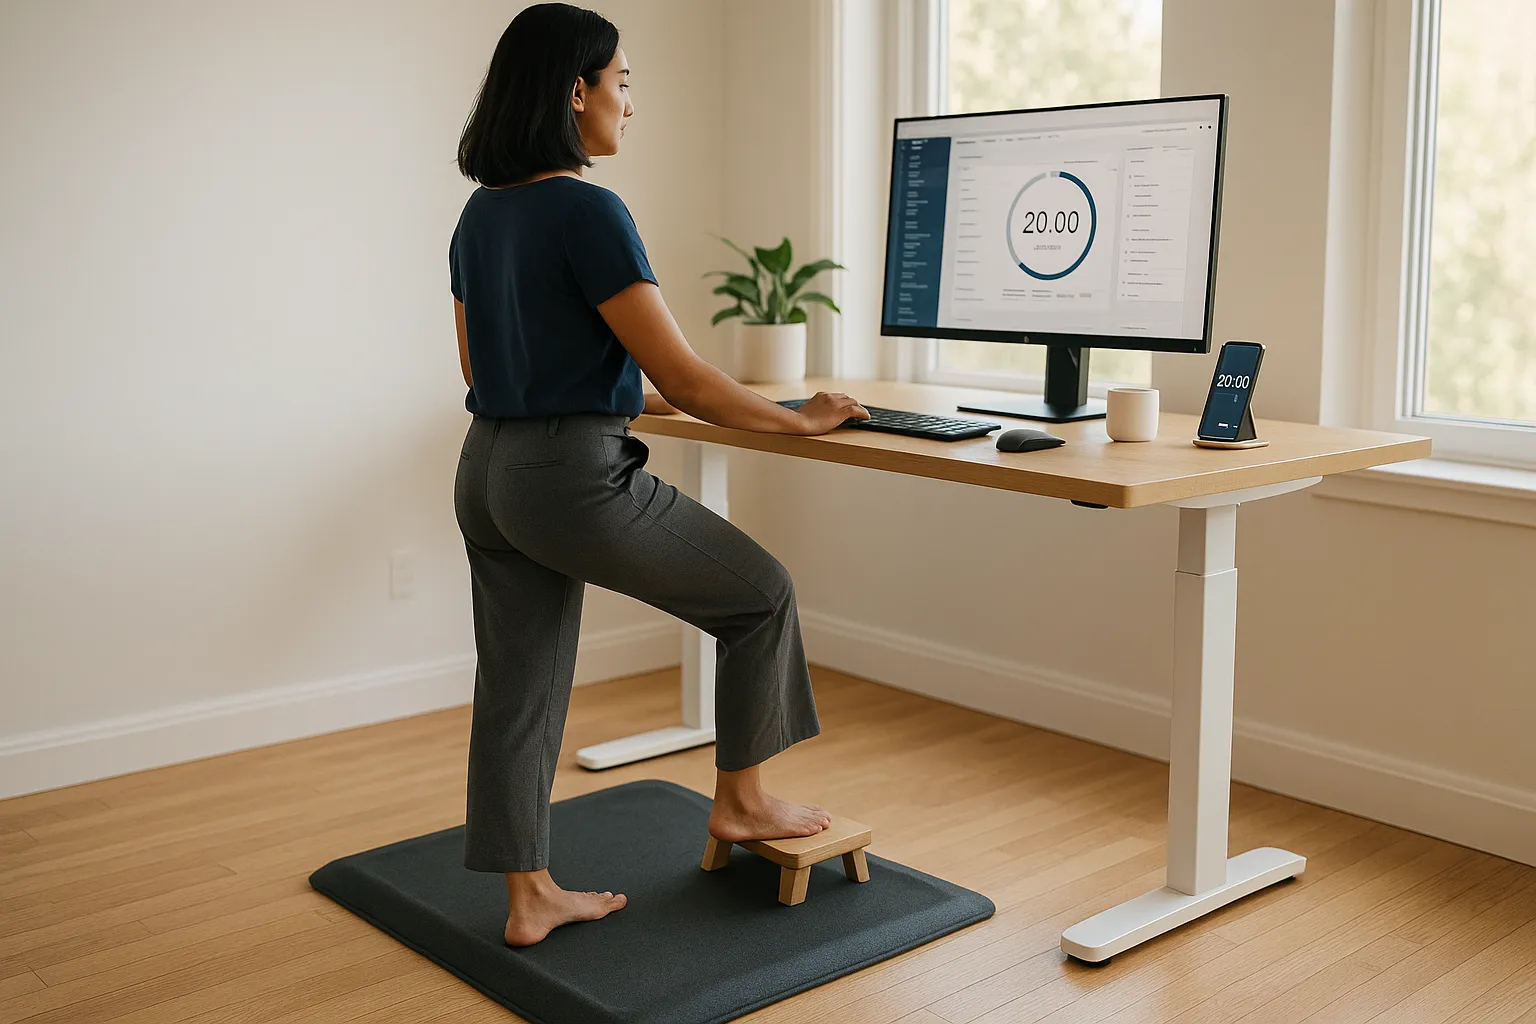
Practice the 20-20-20 Sit-Stand Rule
The ideal ratio isn't 8 hours standing or 8 hours sitting. It's constant variation. Try this pattern:
- 20 minutes standing
- 20 minutes sitting
- 20 minutes of activity (walking, stretching, moving)
Set a timer initially. After two weeks, you'll naturally feel when it's time to switch positions. Your body will tell you.
Maintain proper posture while standing: shoulders relaxed, spine straight, knees slightly bent (never locked), weight distributed evenly. Shift your weight between feet. Use a footrest to elevate one foot periodically.
For a complete checklist of standing posture elements, reference this ergonomic workstation setup checklist that covers every detail.
Your action step: If you don't have an anti-fatigue mat, order one today. Set a 20-minute timer on your phone right now and commit to switching positions when it sounds.
Step 5: Fine-Tune Your Setup and Build Healthy Habits
Your initial setup gets you 80% of the way there. The final 20% comes from daily refinement and habit building.
Test your setup for one full work week. Note any discomfort that appears after 2+ hours. Pain in a specific location signals a positioning problem in that area.
Common adjustment signals:
Discomfort LocationLikely CauseQuick FixLower backStanding too longIncrease sit-stand transitionsNeckMonitor too low/highAdjust screen to eye levelShouldersDesk too highLower surface 1-2 inchesWristsKeyboard angle wrongFlatten keyboard, check height
Wear supportive footwear. Flat dress shoes and high heels create problems at standing desks. Opt for shoes with arch support or keep dedicated standing shoes at your workstation.
Take microbreaks every 30 minutes. Look away from your screen. Roll your shoulders. Stretch your wrists. Walk to the water cooler. These 30-second interruptions prevent cumulative strain.
Document your measurements. Write down your final desk height, monitor position, and mat thickness. When you travel or move offices, you'll recreate your proper ergonomic desk setup instantly.
Your action step: Create a note on your phone with your exact measurements. Include desk height (in inches), monitor distance (arm's length), and keyboard position (B key centered).
Troubleshooting Common Standing Desk Discomforts
Even with proper setup, you may experience discomfort during the transition period. Here's how to diagnose and fix the most common issues.
Foot pain after 1-2 hours: Your mat is too thin or you're standing stationary. Get a thicker mat (minimum 3/4 inch) and shift your weight consciously every few minutes.
Lower back ache by mid-afternoon: You're either standing too long without breaks or your pelvis is tilting forward. Practice engaging your core muscles slightly while standing. Transition to sitting more frequently.
Sore shoulders by end of day: Your desk is likely too high, forcing a constant slight shrug. Lower the surface until your shoulders rest naturally while typing.
Wrist tingling or numbness: This is serious and indicates nerve compression. Check that your wrists are straight (not bent in any direction) while typing. Consider a keyboard tray that allows negative tilt. If symptoms persist beyond 48 hours, consult a healthcare professional.
Eye fatigue and headaches: Your monitor is positioned incorrectly or your lighting creates glare. Verify the top of your screen is at eye level and adjust room lighting to eliminate reflections on your display.
General fatigue: You're probably standing too long initially. Your body needs 2-4 weeks to adapt. Start with 30-minute standing intervals and gradually increase.
Download this workplace ergonomics PDF for a printable reference you can keep at your desk.
Your action step: If you're experiencing any discomfort right now, identify which category it falls into above and make that single adjustment today.
Your Next Step Toward a Pain-Free Workday
You now have everything you need to create an ergonomic standing desk setup that actually works. The five steps above address desk height, monitor positioning, input device placement, body support, and habit building.
But information without action changes nothing. Pick one step from this guide and carry out it in the next 15 minutes. Most people start with Step 1 (desk height) because it takes 60 seconds and affects everything else.
Remember: your body is giving you feedback constantly. Listen to it. Adjust when something feels wrong. The perfect ergonomic setup isn't a destination but a daily practice of paying attention and making small corrections.
Your wrists, neck, and back will thank you.
Frequently Asked Questions
What is the correct height for an ergonomic standing desk setup?
The ideal standing desk height positions your elbows at a 90-degree angle with forearms parallel to the desk surface. For most people, this ranges from 36–38 inches (under 5'5"), 39–42 inches (5'6"–6'0"), or 43–47 inches (over 6'1"). Always adjust while wearing your typical work shoes and standing on your anti-fatigue mat.
How far should my monitor be from my eyes at a standing desk?
Position your monitor 20–30 inches from your eyes, roughly arm's length away. The top edge of the screen should align with or sit slightly below eye level. This prevents neck strain from tilting your head and reduces eye fatigue during long work sessions.
How long should you stand at a standing desk before sitting?
Experts recommend the 20-20-20 rule: 20 minutes standing, 20 minutes sitting, and 20 minutes of light activity like walking or stretching. Constant variation between positions is healthier than standing or sitting for extended periods. Your body needs 2–4 weeks to fully adapt to regular standing intervals.
Can a standing desk cause back pain if set up incorrectly?
Yes, an improperly configured standing desk can cause more spinal stress than sitting. Common culprits include desk height that's too high (causing shoulder tension), monitors positioned too low (straining your neck), and standing too long without breaks. Proper ergonomic positioning is essential to avoid chronic discomfort.
What type of mat is best for standing desk use?
Choose an anti-fatigue mat with at least 3/4-inch thickness for adequate cushioning. Look for beveled edges to prevent tripping and textured surfaces that encourage subtle foot movement. Quality mats absorb impact forces and promote blood circulation during extended standing sessions.
Why does my neck hurt when using a standing desk?
Neck pain typically results from monitor positioning that's too low or too high, forcing you to tilt your head unnaturally. The top third of your screen should align with your natural eye level. For laptop users, an external monitor or laptop stand with a separate keyboard eliminates the downward neck crane that causes strain.

Which Device Is Right for You?
Take a quick quiz and get a personalized recommendation based on how you work.
