
How to Set Up an Ergonomic Office Desk That Prevents RSI and Keeps You Pain-Free

An ergonomic office desk setup can mean the difference between thriving in your career and dreading every workday. If you spend 6–10 hours at your computer, you already know the stakes: wrist pain that lingers into the evening, neck stiffness that disrupts sleep, or shoulder tension that builds with every deadline.
Here's the good news. Most workstation pain comes from fixable problems. A monitor positioned too low. A chair that doesn't support your spine. A mouse that forces your arm into an unnatural reach. Small adjustments to these elements can eliminate discomfort and help you work without physical compromise.
This guide walks you through each component of your desk setup, from chair to cable management. You'll learn specific measurements, angles, and positioning strategies backed by ergonomic research. Whether you're recovering from RSI or preventing it, you'll finish with the tools to build a workspace that supports your body instead of fighting it.
Key Takeaways
- A proper ergonomic office desk setup starts with your chair—adjust seat height so feet rest flat and thighs are parallel to the floor.
- Position your monitor at arm's length with the top of the screen at or slightly below eye level to reduce neck and eye strain.
- Keep your keyboard centered and flat (feet folded down) with wrists straight and forearms parallel to the floor.
- Centered pointing devices or ergonomic mice reduce shoulder strain caused by reaching to the side repeatedly.
- Organize your desk so frequently used items stay within the neutral zone—the area you can reach without extending your arms.
- Take regular movement breaks using the 20-20-20 rule to prevent cumulative strain, even with an optimized ergonomic office desk setup.
Why Your Current Desk Setup Might Be Causing Pain

Pain doesn't always announce itself loudly. Sometimes it creeps in over months or years, disguised as "normal" fatigue. Understanding the true cost of a poor setup is the first step toward fixing it.
The Hidden Costs of Poor Posture and Repetitive Strain
Repetitive strain injuries (RSI) affect millions of office workers annually. The Cleveland Clinic reports that spending several hours daily at a poorly configured desk leads to predictable aches and pains that compound over time.
The financial toll adds up fast. Workers with ergonomic-related injuries miss an average of 11 days per year. Treatment costs, lost productivity, and potential disability claims can cost employers $15,000–$20,000 per incident. For cases of carpal tunnel syndrome, the cost can go up to $30,000. For individuals, chronic pain affects everything from job performance to relationships.
What poor posture actually does to your body:
- Hunching forward compresses spinal discs and strains neck muscles
- Reaching for a mouse positioned too far away fatigues shoulder stabilizers
- Typing with bent wrists pinches nerves and inflames tendons
- Looking down at a low monitor pulls head weight forward (your head weighs 10–12 pounds)
These aren't minor inconveniences. They're progressive injuries that worsen without intervention.
Signs Your Workstation Needs an Ergonomic Overhaul
Your body sends clear signals when something's wrong. The challenge is to recognize them before they become chronic conditions.
Red flags that demand attention:
- Tingling or numbness in fingers after typing sessions
- Neck stiffness that persists into evenings and weekends
- Shoulder pain that radiates down your arm
- Lower back ache that improves when you stand
- Eye strain or headaches by mid-afternoon
Notice when symptoms appear. Pain that starts around 2 PM and worsens through the day points to cumulative strain from your setup. Pain that's worst in the morning but improves with movement suggests sleeping position issues.
Take action today: Photograph your current workstation from the side while sitting naturally. Compare your posture to the standards in this guide. Most people discover 3–5 immediate fixes.
Start With Your Chair: The Foundation of Ergonomic Comfort
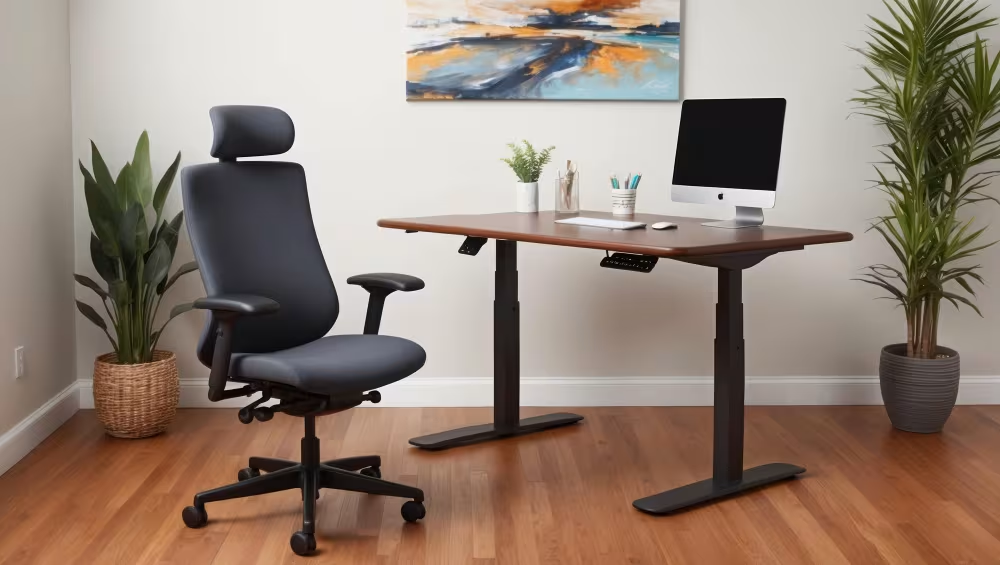
Your chair is the foundation of your workstation and is the determining factor in the rest of your setup. Get it wrong, and no amount of monitor adjustment or keyboard repositioning will save you.
Adjusting Seat Height and Depth for Neutral Posture
The goal is a neutral sitting position: feet flat, thighs parallel to the floor, and knees at roughly 90 degrees. This distributes your weight evenly and reduces pressure on your lower spine.
Seat height adjustment:
- Stand in front of your chair
- Adjust height so the seat pan touches just below your kneecap
- Sit down and check that your feet rest flat on the floor
- If your desk is too high, use a footrest rather than raising the chair
Seat depth matters more than most people realize. You should have 2–4 finger-widths of space between the front edge of the seat and the back of your knees. Too deep, and you'll slouch forward. Too shallow, and your thighs won't be supported.
Many office chairs have a seat slide adjustment. If yours doesn't, and you're shorter than 5'6", consider a chair with a smaller seat pan. For more guidance on optimizing your workspace, explore this comprehensive home office guide.
Supporting Your Lower Back and Shoulders
Your lumbar spine curves inward naturally. Without support, sitting flattens this curve and strains muscles and discs.
Backrest positioning:
- Recline angle between 100° and 110° (slightly past vertical)
- Lumbar support should fit the curve of your lower back, typically 6–10 inches above the seat
- Your shoulder blades should contact the backrest when relaxed
Armrest setup:
- Height should allow shoulders to remain relaxed (not shrugged up or hanging down)
- Width should keep elbows close to your body, roughly hip-width apart
- Armrests that are too wide force you to reach outward for your mouse
- Armrests should keep your elbows at roughly 90° and should align with the height of your desk.
Take action today: Spend 5 minutes adjusting every lever and knob on your chair. Most people use only 1–2 of the available adjustments.
Position Your Monitor to Reduce Neck and Eye Strain

Your monitor position determines where you hold your head for hours each day. The Mayo Clinic's office ergonomics guide provides a helpful visual reference for comfortable seated work.
Finding the Ideal Height and Distance
Monitor height rule: The top of your screen should be at or slightly below eye level. This allows you to view the screen with a slight downward gaze (about 15–20 degrees), which is more comfortable than looking straight ahead or up.
Distance guidelines:
- Arm's length is the starting point (typically 20–26 inches)
- Increase distance to 30–40 inches for monitors 27 inches or larger
- If you catch yourself leaning forward to read, increase font size rather than moving closer
Direct positioning matters. Your primary monitor should sit directly in front of you, not off to one side. Turning your head even 15 degrees for 8 hours creates significant neck strain.
Monitor arms offer flexibility that fixed stands can't match. They let you push the screen back for document review or pull it closer for detail work. The investment (typically $30–$150) pays for itself in comfort.
Dual-Monitor and Laptop Setup Considerations
Dual monitors require strategic placement. If you use both equally, center the gap between them in front of your nose. If one is primary, place it directly ahead and angle the secondary toward you at 30–45 degrees.
Laptop users face unique challenges. Built-in screens sit too low, and built-in keyboards sit too high. The solution: treat your laptop as a secondary display or CPU.
Ideal laptop setup:
- External monitor at proper height and distance
- External keyboard and mouse at desk level
- Laptop raised on a stand if using its screen, paired with external input devices
Take action today: Place a sticky note on your monitor at eye level. If you're looking above it while working, your screen is too low.
Set Up Your Keyboard for Relaxed Shoulders and Wrists
.avif)
Keyboard placement affects your shoulders, elbows, wrists, and fingers. Poor positioning creates a cascade of tension that radiates upward.
Keyboard Placement and Tilt Angles That Matter
The neutral wrist position: Your wrists should be straight, not bent up, down, or to the sides. Your forearms should be roughly parallel to the floor or angled slightly downward.
Positioning checklist:
- Keyboard directly in front of you, centered on the letters (not the whole keyboard, which shifts you left)
- Height that allows forearms to be level with or slightly below elbow height
- Close enough that your elbows stay near your sides, not reaching forward
- Keyboard feet should typically stay folded down (positive tilt increases wrist extension)
The keyboard tray debate: Tray systems place your keyboard below desk level, which often achieves better ergonomics. But cheap trays create instability. If your desk allows proper positioning without a tray, you may not need one.
For a deeper look at how your keyboard, wrist rest, and mouse work together, this article on the three pillars of office equipment ergonomics breaks down the relationships clearly.
Why Split and Ergonomic Keyboards Make a Difference
Standard keyboards force your hands into a pronated position with wrists angled outward. This stresses the carpal tunnel and forearm muscles.
Split and ergonomic keyboards address this by:
- Allowing hands to remain shoulder-width apart
- Angling key sections to reduce wrist deviation
- Some models add tenting (raising the center) to reduce pronation
The transition takes 1–3 weeks for most users. Typing speed drops initially, then returns to normal. The long-term benefit: reduced strain on nerves, muscles, and tendons that don't heal easily once damaged.
Take action today: Fold down your keyboard feet if they're extended. This single change reduces wrist extension immediately.
Choose a Mouse That Supports Your Arm—Not Just Your Hand
Your mouse choice might be the most underestimated ergonomic decision you make. Traditional mice require repetitive reaching, gripping, and clicking motions that accumulate into real damage.
Traditional Mice vs. Centered Pointing Devices
Standard mice sit to the side of your keyboard. This creates two problems:
- Shoulder abduction: Your arm extends away from your body, fatiguing the shoulder stabilizers
- Forearm pronation: Your palm faces down, twisting the radius and ulna bones which adds pressure on the nerves that run through your wrists.
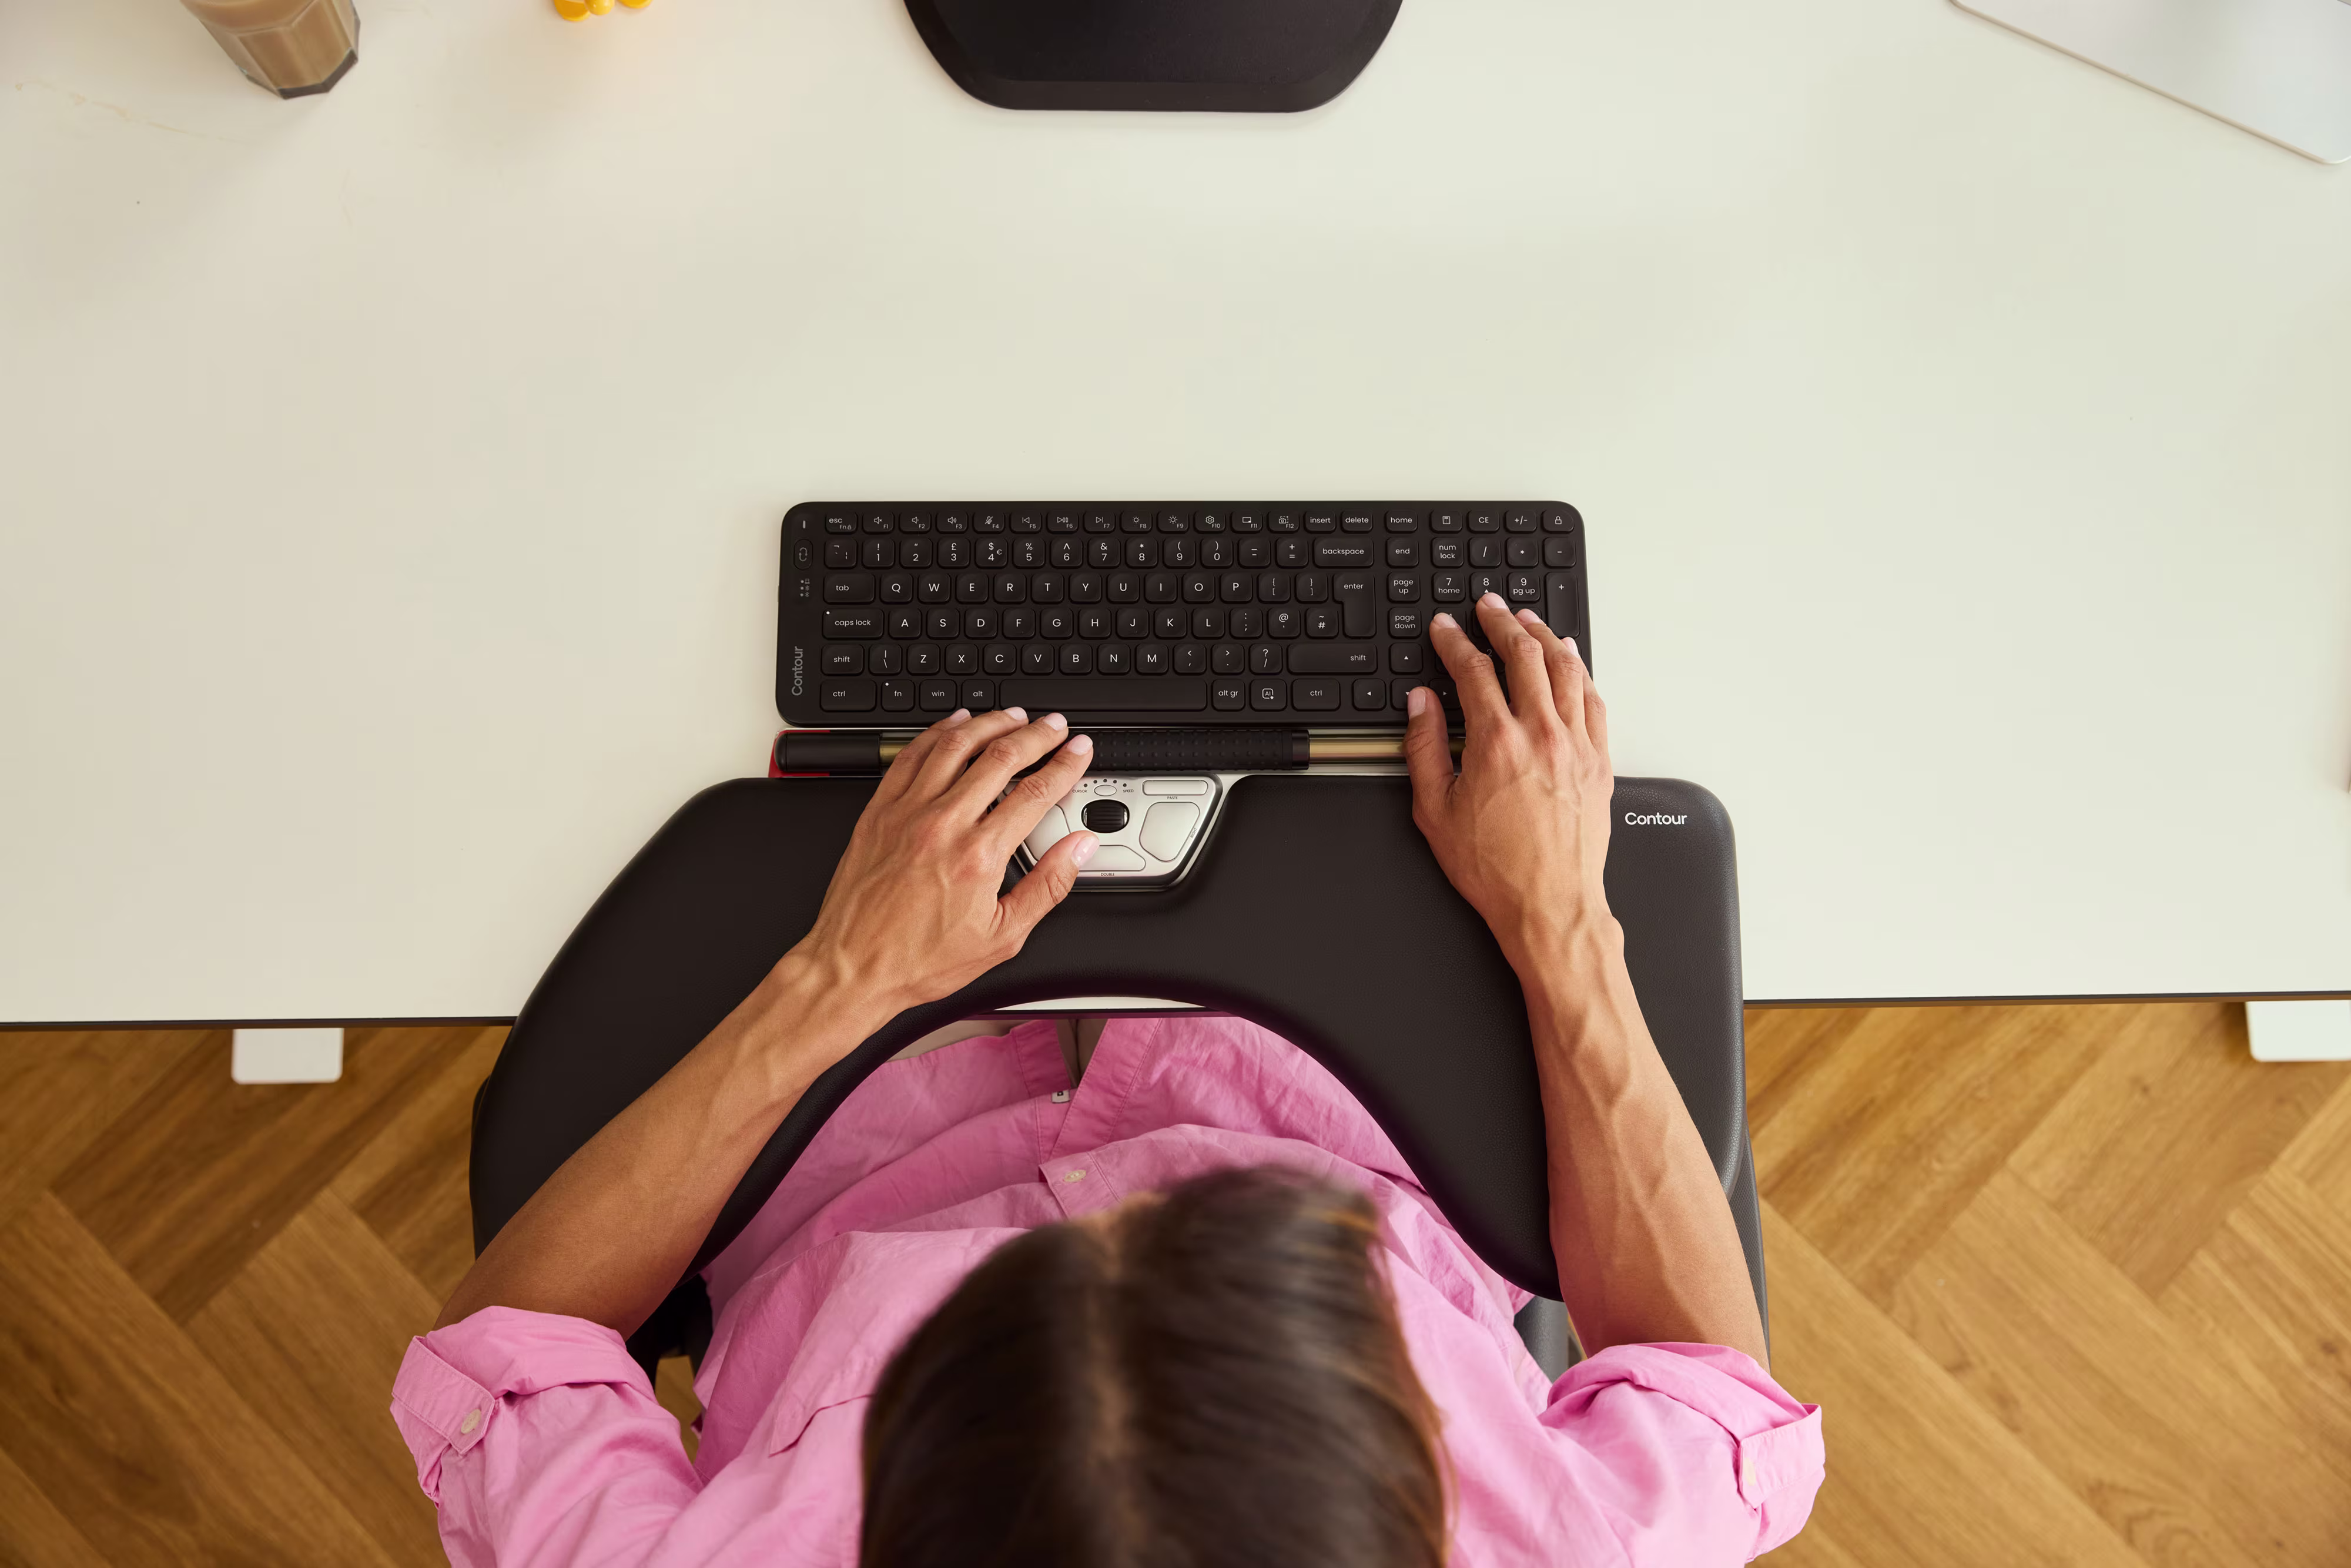
Centered pointing devices like RollerMouse sit directly in front of you, between your keyboard and monitor. This eliminates shoulder reach entirely. Your hands stay in the neutral zone, and both hands can share the pointing workload.
Cornell University's ergonomics research provides a detailed checklist for evaluating workstation setup, including pointing device positioning.
How Adjustable, Ergonomic Mice Reduce Forearm Tension
Not everyone can switch to a centered device. If you need a traditional mouse form factor, adjustability becomes critical.
What to look for:
- Adjustable angle: The ability to customize tilt between 35° and 70° lets you find your personal comfort zone
- Multiple grip positions: Different tasks benefit from different hand positions
- Programmable buttons: Reducing clicks reduces strain
- Appropriate weight: Too heavy fatigues muscles, while too light reduces control
Contour Design's Unimouse, for example, offers adjustable tilt angles that let users customize their grip position. The RollerMouse series eliminates traditional mouse movement entirely by placing controls between you and the keyboard, removing lateral reaching.
9 out of 10 users who switch to ergonomically designed pointing devices report reduced discomfort within 2–4 weeks. The adjustment period is shorter than most expect.
Take action today: Notice how far you reach for your current mouse. If your elbow moves away from your body, you're creating shoulder strain with every click.
.avif)
Organize Your Desk for Effortless Reach and Movement
A well-arranged desk reduces micro-movements that add up over thousands of repetitions daily.
Keeping Tools Within the Neutral Zone
The neutral zone is the area you can reach without extending your arms or rotating your torso. Items you use hourly belong here. Less frequent items can sit further away.
Zone-based organization:
- Primary zone (closest): Keyboard, mouse/pointing device, phone, water bottle
- Secondary zone (arm's reach): Notepad, frequently referenced documents, stapler
- Tertiary zone (requires movement): Printer, reference materials, storage
Document holders positioned beside your monitor reduce neck rotation when transcribing. Angled at the same height and distance as your screen, they eliminate the up-and-down head movement that strains cervical muscles.
Investing in an ergonomically correct workstation pays dividends through injury prevention and sustained productivity.
Cable Management and Clutter-Free Workspace Tips
Clutter creates visual stress and physical obstacles. Cables that cross your work surface force awkward reaching patterns.
Practical cable solutions:
- Cable trays mounted under the desk hide power strips and excess length
- Velcro straps bundle related cables together
- Wireless peripherals eliminate cables at the desk surface
- Cable clips route necessary cables along desk edges
A clear desk surface allows you to reposition items as needed throughout the day. Flexibility matters because static setups, even good ones, benefit from occasional variation.
Take action today: Clear everything from your desk. Return items one at a time, placing each in its optimal position. Anything that doesn't earn its place gets stored elsewhere.
Add Finishing Touches: Lighting, Footrests, and Breaks
The big elements are set. But it’s the small details that separate good setups from great ones.
Lighting considerations:
- Position your monitor perpendicular to windows to avoid glare
- Task lighting should illuminate documents without reflecting on your screen
- Overhead lighting works best when diffused, not directly overhead
- Screen brightness should match ambient room lighting
Footrest benefits: If your chair height positions your feet above the floor, a footrest isn't optional. It maintains the 90-degree knee angle and prevents pressure on the backs of your thighs.
The break imperative: No setup, no matter how perfect, compensates for 8 hours of immobility. The human body needs movement.
Evidence-based break protocols:
- 20-20-20 rule: Every 20 minutes, look at something 20 feet away for 20 seconds
- Micro-breaks: 30 seconds of standing or stretching every 30 minutes
- Movement breaks: 5–10 minutes of walking every hour
Wirecutter's ergonomics research emphasizes that even expert-designed workstations require regular movement to maintain their benefits.
Take action today: Set a recurring timer on your phone for every 30 minutes. When it rings, stand up and stretch for 30 seconds. This habit alone can reduce cumulative strain by 40% or more.
Next Steps: Build a Workspace That Works for You
You now have the knowledge to transform your workspace. The question is where to start.
If you're experiencing active pain: Address the likely culprit first. Wrist pain points to keyboard and mouse positioning. Neck pain suggests monitor height issues. Lower back pain indicates chair problems. Fix the source of current symptoms before optimizing everything else.
If you're preventing future problems: Work through this guide systematically, starting with your chair. Each adjustment builds on the previous one.
For those upgrading equipment: Ergonomic peripherals make a measurable difference, but only when combined with proper positioning. A $200 chair used incorrectly won't outperform a $50 chair adjusted properly.
For ongoing resources, the everything you need to know about ergonomics guide provides deeper exploration of each topic covered here.
Your workspace should support your work, not sabotage it. Take 15 minutes today to carry out one change from this guide. Then another tomorrow. Within a week, you'll notice the difference. Within a month, you'll wonder how you worked any other way.
Frequently Asked Questions
What is the ideal height for an ergonomic office desk setup?
The ideal desk height is typically 28–30 inches, depending on your height, allowing your elbows to rest at a 90-degree angle while typing. Your forearms should be parallel to the floor with shoulders relaxed. If your desk is fixed, adjust your chair height and use a footrest to maintain proper alignment.
How should I position my monitor to reduce neck strain?
Place your monitor directly in front of you at arm's length (20–40 inches), with the top of the screen at or slightly below eye level. This allows a comfortable 15–20 degree downward gaze. For larger monitors (27 inches or more), increase the distance to 30–40 inches.
What are the signs that my workstation needs an ergonomic overhaul?
Key warning signs include tingling or numbness in your fingers after typing, neck stiffness that persists into evenings, shoulder pain radiating down your arm, lower back ache that improves when standing, and eye strain or headaches by mid-afternoon. Pain worsening throughout the workday indicates cumulative strain from your setup.
How do I adjust my office chair for proper ergonomic support?
Set seat height so feet rest flat on the floor with knees at 90 degrees and thighs parallel to the floor. Position the backrest at 100–110 degrees with lumbar support fitting your lower back curve. Adjust armrests so shoulders stay relaxed with elbows close to your body.
Why are ergonomic keyboards and mice better than traditional options?
Standard keyboards force wrists into unnatural angles, while traditional mice cause shoulder strain from reaching sideways. Ergonomic split keyboards allow hands to remain shoulder-width apart with reduced wrist deviation. Adjustable or centered mice eliminate shoulder reach and forearm pronation, with 9 out of 10 users reporting reduced discomfort within 2–4 weeks.
How often should I take breaks when working at a desk?
Follow evidence-based protocols: the 20-20-20 rule (every 20 minutes, look 20 feet away for 20 seconds), micro-breaks (30 seconds of standing or stretching every 30 minutes), and movement breaks (5–10 minutes of walking every hour). Regular breaks can reduce cumulative strain by 40% or more.

Which Device Is Right for You?
Take a quick quiz and get a personalized recommendation based on how you work.
